As I sifted through my pantry yesterday, a vibrant can of pumpkin puree caught my eye, instantly evoking the warmth of the holiday season. That's when I decided to whip up a batch of Christmas Pumpkin Brownies. These delightful treats are not only a whimsical twist on traditional brownies but also effortlessly bridge the gap between comforting desserts and festive flavors. With a quick prep time and the joyous aroma that fills your kitchen, they make the perfect addition to any holiday gathering or cozy night in. Plus, they’re crowd-pleasers, certain to enchant both family and friends. Curious how to conjure up this sweet seasonal delight? Let’s get baking!
Why are Christmas Pumpkin Brownies irresistible?
Rich, Chocolatey Bliss: The blend of cocoa and pumpkin makes these brownies a decadent treat.
Quick to Prepare: In just 15 minutes, you'll have your batter ready, allowing you to focus on indulging.
Festive Flavors: The hint of pumpkin adds warmth and a unique depth that typical brownies lack.
Perfect for Sharing: These brownies are a surefire hit at holiday gatherings, charming everyone who tries them.
Moist and Fudgy: Thanks to pumpkin puree, every bite is delightfully fudgy and satisfying.
Christmas Pumpkin Brownies Ingredients
For the Brownie Batter
• 1 cup all-purpose flour – essential for that classic brownie texture.
• ½ cup unsweetened cocoa powder – adds rich chocolate flavor; use Dutch-process for a deeper taste.
• 1 cup granulated sugar – balances the flavors and contributes to sweetness.
• ½ cup pumpkin puree – offers moisture and festive essence to these Christmas Pumpkin Brownies.
• 2 large eggs – bind the ingredients and provide a rich structure.
• ½ cup melted butter – keeps the brownies moist and buttery.
• 1 teaspoon vanilla extract – enhances the sweetness with a hint of warmth.
• 1 teaspoon baking powder – helps the brownies rise and become fluffy.
• ¼ teaspoon salt – intensifies the flavors and balances the sweetness.
Step‑by‑Step Instructions for Christmas Pumpkin Brownies
Step 1: Preheat the Oven
Begin by preheating your oven to 350°F (175°C). As it warms up, take an 8x8-inch baking pan and grease it lightly with butter or spray it with nonstick cooking spray. Alternatively, you can line the pan with parchment paper for easy brownie removal. This step ensures your Christmas Pumpkin Brownies bake evenly and come out perfectly.
Step 2: Mix Dry Ingredients
In a medium mixing bowl, whisk together 1 cup of all-purpose flour, ½ cup of unsweetened cocoa powder, 1 teaspoon of baking powder, and ¼ teaspoon of salt. Combine these dry ingredients thoroughly until they are well mixed and free of lumps. Setting this aside allows the baking powder to activate later, ensuring your brownies rise beautifully and have a rich chocolate flavor.
Step 3: Combine Wet Ingredients
In a separate large bowl, combine ½ cup of melted butter and 1 cup of granulated sugar. Use a whisk to mix these ingredients until they are creamy and smooth. Then, add in 2 large eggs one at a time, whisking well after each addition. Finally, stir in 1 teaspoon of vanilla extract and ½ cup of pumpkin puree, mixing until everything is fully incorporated for the scrumptious Christmas Pumpkin Brownies batter.
Step 4: Blend Wet and Dry Mixtures
Gradually add the dry mixture to the wet ingredients, folding them together gently with a spatula. Mix until you see no dry flour, but be careful not to overmix; the batter should remain thick and slightly lumpy. This care in mixing ensures your brownies will be perfectly fudgy without becoming tough, setting the stage for your delightful dessert.
Step 5: Layer the Batter
Pour half of the brownie batter into the prepared baking pan, spreading it evenly across the bottom. Take the remaining batter and dollop it over the first layer. With a knife, gently swirl the two layers together, creating a beautiful marbled effect that enhances the appearance and flavor of your Christmas Pumpkin Brownies.
Step 6: Bake the Brownies
Place the layered batter in the preheated oven and bake for 25-30 minutes. Check for doneness by inserting a toothpick into the center; it should come out clean or with a few moist crumbs attached. This might take a little longer depending on your oven, so keep an eye on it to achieve perfect, fudgy brownies.
Step 7: Cool and Serve
Once your Christmas Pumpkin Brownies are baked to perfection, remove them from the oven and allow them to cool in the pan for about 10-15 minutes. After cooling, use a knife to gently loosen the edges, then cut into squares. Letting them cool fully will make slicing easier and ensure a delightful texture for everyone to enjoy.
Christmas Pumpkin Brownies Variations
Feel free to get creative and cater these brownies to your taste; the options are as delightfully diverse as the holiday season itself!
-
Gluten-Free: Substitute all-purpose flour with a 1:1 gluten-free flour blend for deliciously chewy brownies that everyone can enjoy.
-
Vegan: Replace eggs with flax eggs (1 tablespoon ground flaxseed mixed with 3 tablespoons water per egg) and use plant-based butter for a delightful vegan treat. These brownies will still be moist and fudgy without any compromises.
-
Nutty Addition: Fold in ½ cup of chopped walnuts or pecans for a lovely crunch that complements the fudgy texture perfectly. Your taste buds will sing with joy!
-
Chocolate Chip Boost: Toss in ½ cup of chocolate chips into the batter for an extra chocolatey bliss that takes these brownies over the top. You’ll be reaching for another piece in no time!
-
Spicy Kick: Add ½ teaspoon of cinnamon or nutmeg for a warm spice note that enhances the festive flavors of the pumpkin. This subtle twist brings a cozy feeling to your holiday treats.
-
Minty Freshness: Stir in a few drops of peppermint extract for a refreshing minty flavor, creating a delightful holiday twist perfect for Christmas gatherings.
-
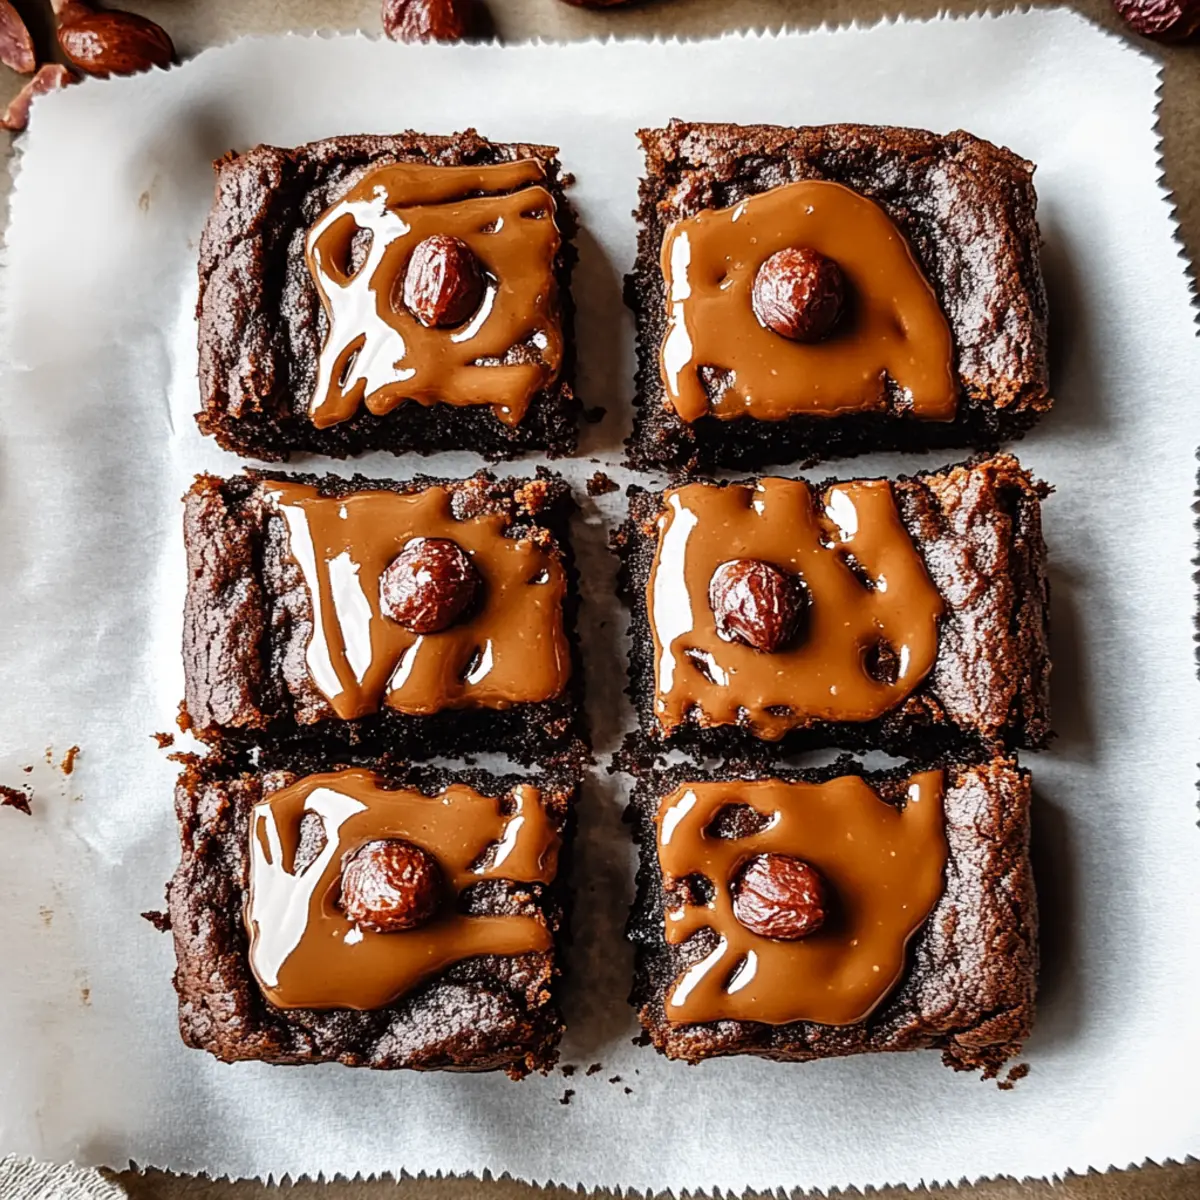
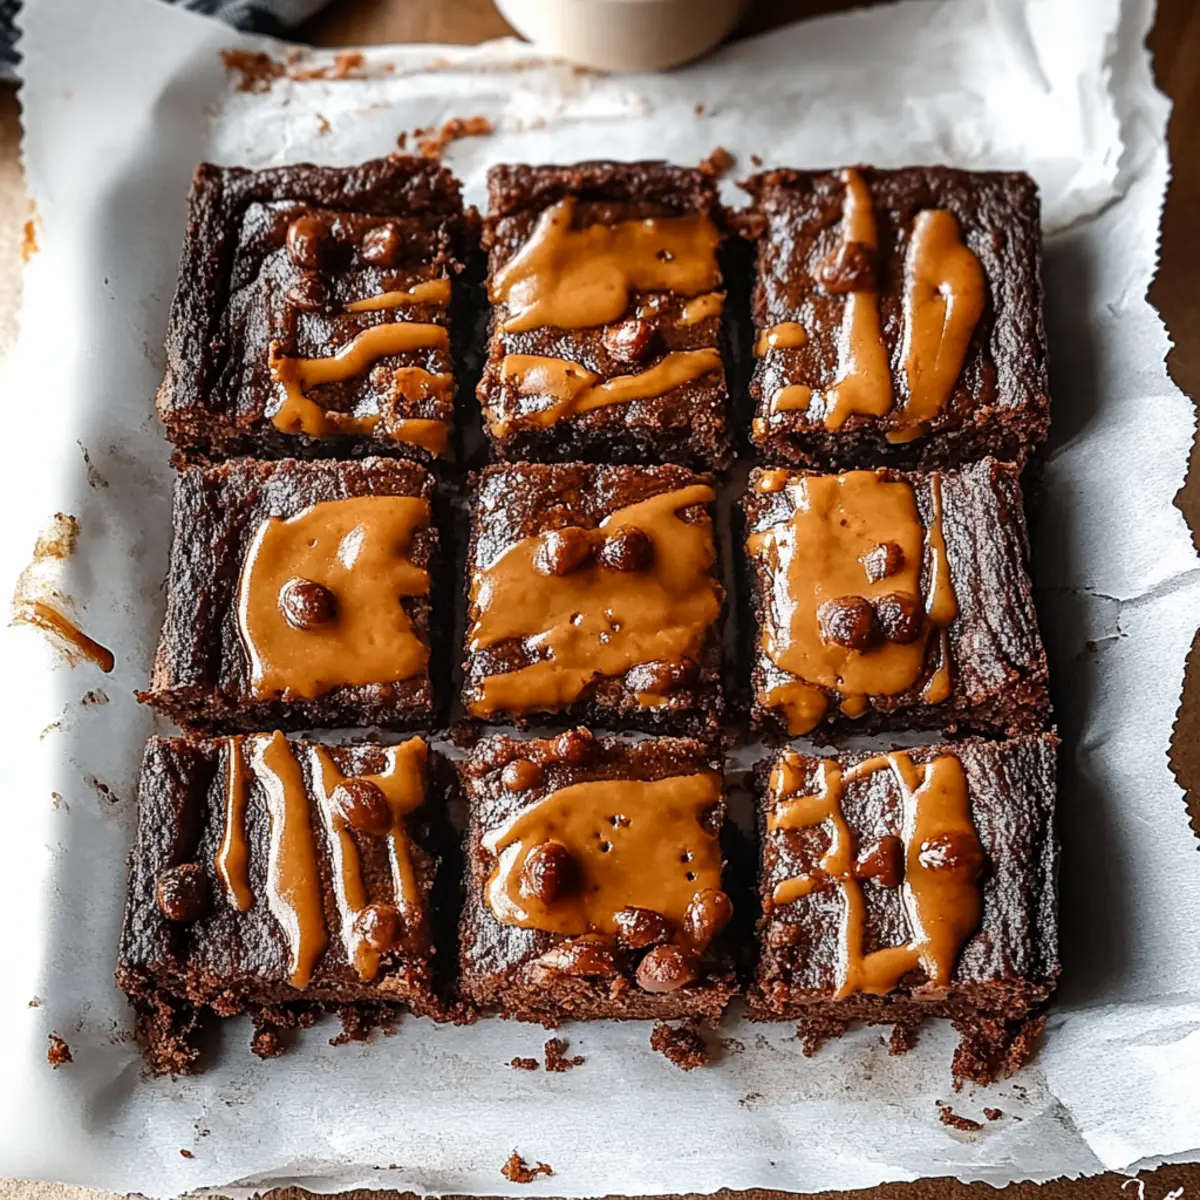
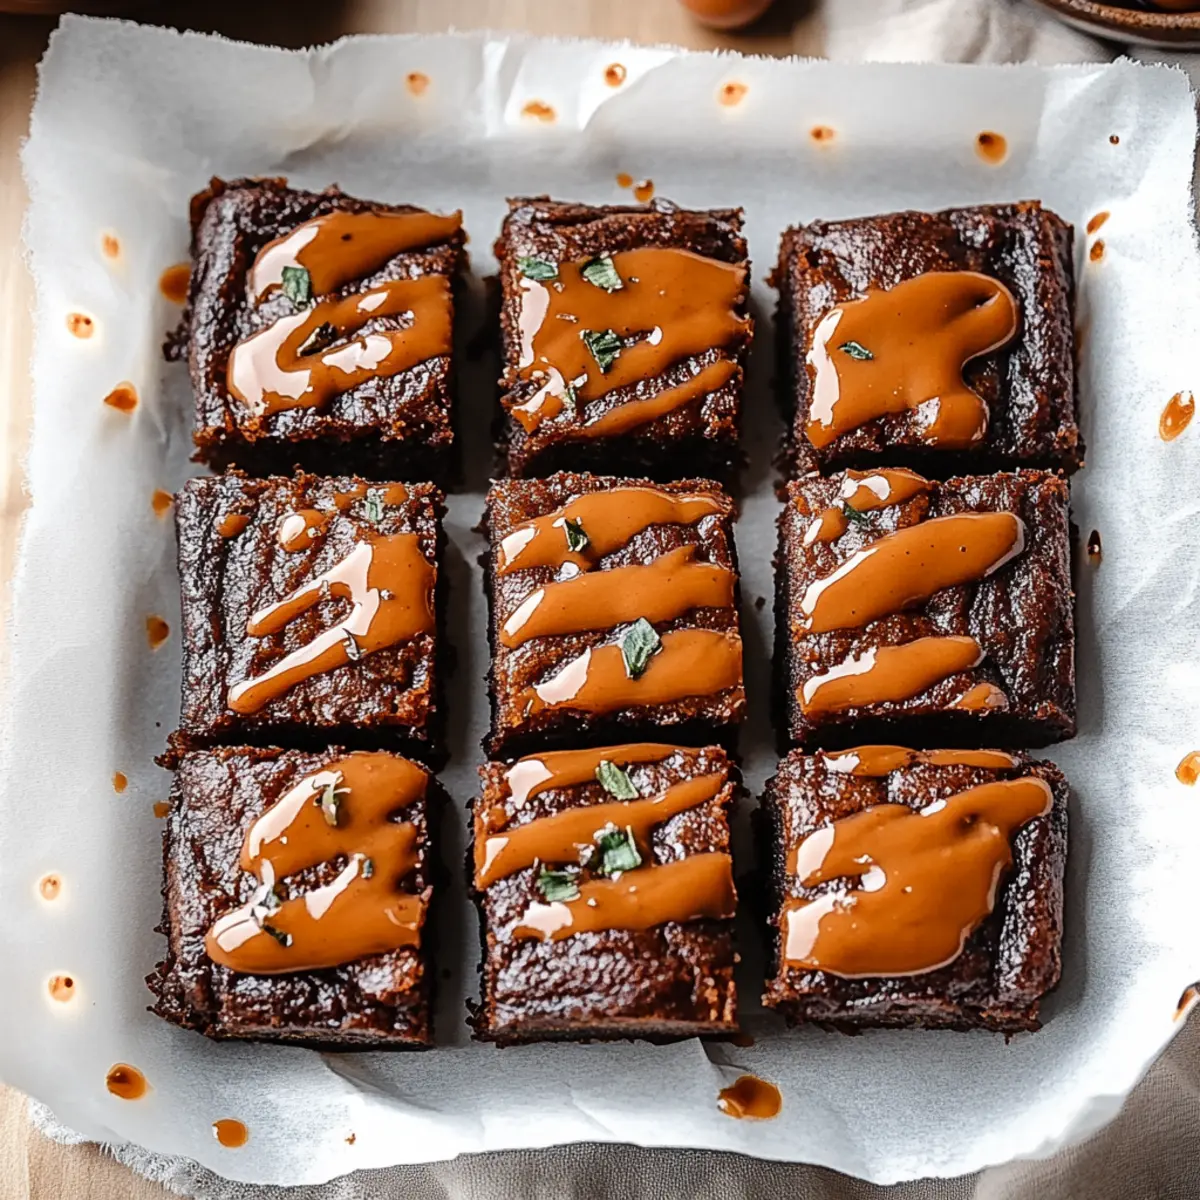
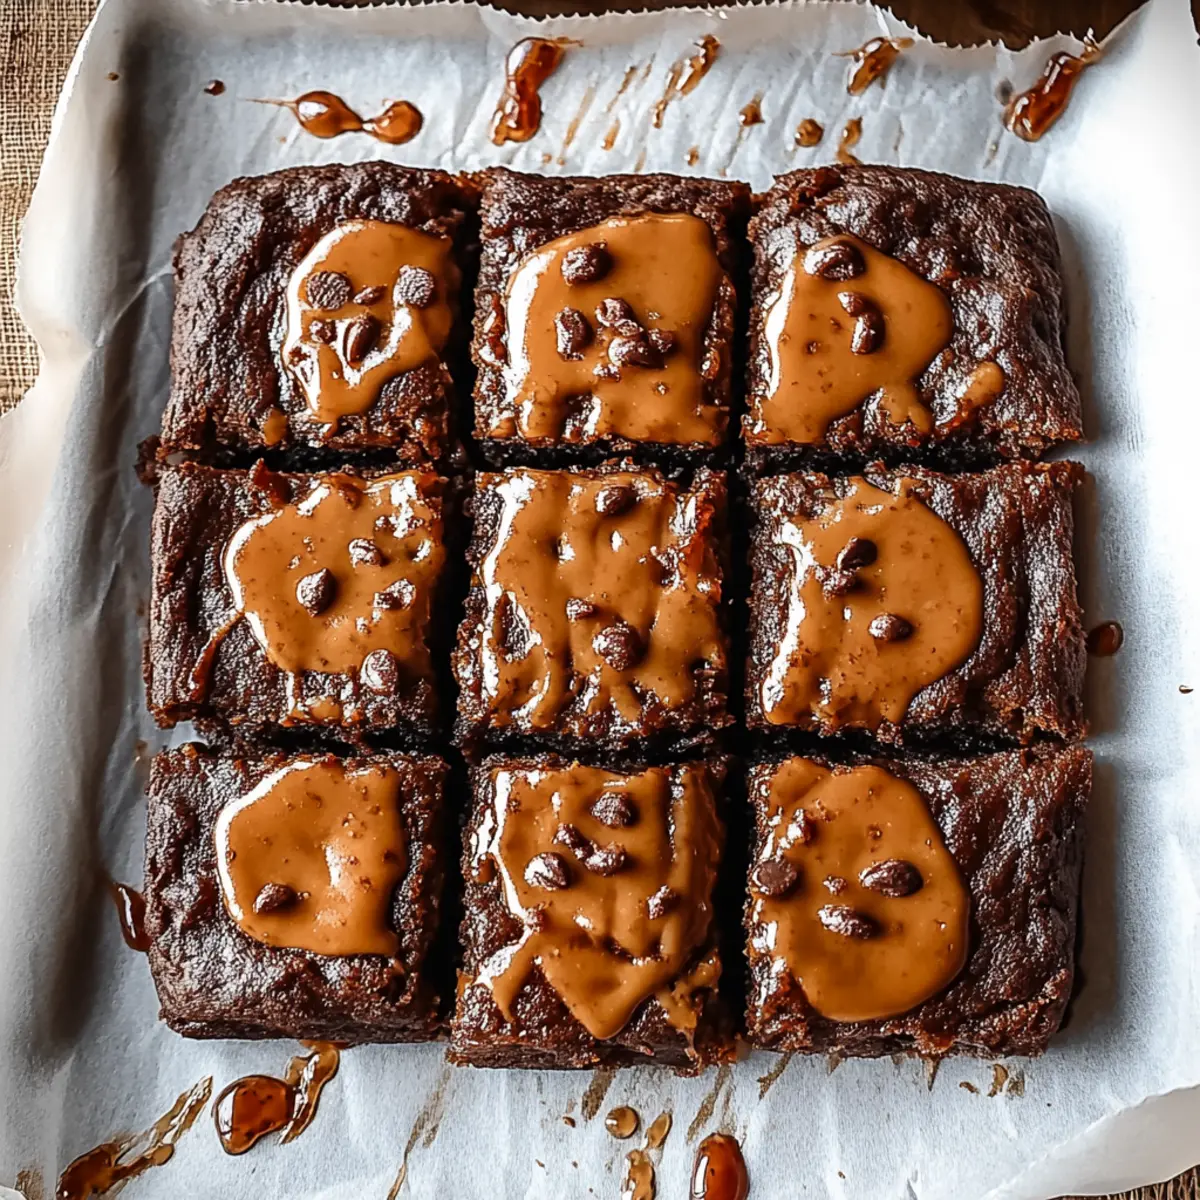
Caramel Swirl: Drizzle caramel sauce into the batter before swirling; it adds a decadent layer of sweetness that will have everyone begging for the recipe. Just imagine the flavor combination!
-
S'mores Style: Top with graham cracker crumbs and mini marshmallows during the last 5 minutes of baking for a s'mores-inspired twist that’s sure to be a hit. It's a fun, nostalgic addition to the holiday table.
Expert Tips for Christmas Pumpkin Brownies
Avoid Overmixing: In Step 4, gently fold the dry ingredients into the wet mixture until just combined to keep your brownies fudgy rather than tough.
Use Quality Cocoa: Opt for high-quality unsweetened cocoa powder, as it significantly enhances the chocolaty flavor of your Christmas Pumpkin Brownies.
Check Oven Temperature: Ovens can vary, so consider using an oven thermometer to ensure accurate baking temperatures for perfect texture.
Cool Before Cutting: Allow the brownies to cool completely in the pan before slicing; this helps maintain their shape and avoids crumbling.
Experiment with Toppings: Consider adding chopped nuts, chocolate chips, or a sprinkle of sea salt on top for extra texture and flavor contrast.
How to Store and Freeze Christmas Pumpkin Brownies
Room Temperature: Keep your Christmas Pumpkin Brownies in an airtight container at room temperature for up to 3 days for optimal freshness.
Fridge: For longer storage, place brownies in the fridge in a sealed container. They'll stay delicious for up to a week; just allow them to return to room temperature before serving.
Freezer: Freeze brownies in a single layer, wrapped tightly in plastic wrap and placed inside a freezer bag, for up to 2 months. Thaw in the fridge overnight before enjoying.
Reheating: To enjoy warm brownies, microwave individual squares for 10-15 seconds or warm in an oven at 350°F (175°C) until heated through, enhancing that fudgy texture.
Make Ahead Options
These Christmas Pumpkin Brownies are perfect for busy home cooks wanting to save time during the festive season! You can prepare the brownie batter up to 24 hours in advance; just cover it tightly with plastic wrap and refrigerate to maintain its freshness. If you prefer, you can also bake the brownies, cool them completely, and store in an airtight container for up to 3 days at room temperature. When you’re ready to serve, simply cut them into squares and enjoy that just-baked taste. This way, you can indulge in delicious holiday treats without the last-minute rush or stress!
What to Serve with Christmas Pumpkin Brownies
As you enjoy the rich, chocolatey essence of these festive treats, the perfect accompaniments can elevate your dessert experience to something truly special.
- Vanilla Ice Cream: A scoop of creamy vanilla ice cream perfectly balances the fudgy texture and brings a delightful chill to each bite.
- Whipped Cream: Light and airy whipped cream adds a luscious finishing touch, enhancing the brownie’s rich flavors and inviting you to indulge.
- Spiced Nut Medley: This crunchy blend of pecans, walnuts, and spices adds a delightful contrast of texture and flavor that complements the warm spices in the brownies.
- Salted Caramel Sauce: Drizzling warm caramel over your brownies adds a heavenly sweetness with a touch of salt that heightens the overall flavor profile.
- Coffee or Espresso: A hot cup of coffee cuts through the sweetness and deepens the chocolate notes, making for a well-rounded dessert experience.
- Pumpkin Spice Latte: For a seasonal twist, pair your brownies with a cozy pumpkin spice latte, amplifying flavors while warming your soul.
- Chocolate Mint Cookies: These cookies offer a refreshing contrast, making delightful companions for the rich decadence of your Christmas Pumpkin Brownies.
- Fresh Berries: A handful of tart raspberries or strawberries brighten the plate, adding a pop of color and a refreshing bite to the sweetness.
Christmas Pumpkin Brownies Recipe FAQs
How do I choose the best pumpkin puree for my brownies?
Absolutely! When selecting pumpkin puree, look for a vibrant orange hue, which indicates ripeness and flavor. Either canned or homemade pumpkin puree will work well, but make sure the canned variety is 100% pumpkin with no added sugars or spices for the best results in your Christmas Pumpkin Brownies.
How should I store leftover brownies?
For optimal freshness, store your Christmas Pumpkin Brownies in an airtight container at room temperature for up to 3 days. If you want to keep them longer, you can refrigerate them in a sealed container for up to a week. Allow them to come back to room temperature before serving to enjoy the rich flavors fully!
Can I freeze my brownies for later?
Yes, indeed! To freeze your Christmas Pumpkin Brownies, first, let them cool completely. Wrap each square individually in plastic wrap, then place them in a freezer bag. They'll retain their deliciousness for up to 2 months. When you're ready to indulge, thaw them overnight in the fridge and reheat as desired.
What should I do if my brownies turn out dry?
If your brownies come out a bit dry, it could be due to overbaking or incorrect oven temperature. Make sure to check them a few minutes before the timer goes off, as ovens can vary. To remedy dry brownies after baking, consider serving them with a scoop of ice cream or drizzling with chocolate sauce to add moisture and flavor.
Are these brownies suitable for gluten-free diets?
You can absolutely make gluten-free Christmas Pumpkin Brownies! Simply substitute the all-purpose flour with a 1:1 gluten-free flour blend, which you can find at most grocery stores. Ensure that all other ingredients, especially the baking powder and cocoa powder, are gluten-free as well to accommodate dietary needs.
Decadent Christmas Pumpkin Brownies for Festive Flavors
Ingredients
Equipment
Method
- Preheat your oven to 350°F (175°C) and lightly grease an 8x8-inch baking pan or line it with parchment paper.
- In a medium bowl, whisk together the flour, cocoa powder, baking powder, and salt until combined.
- In a large bowl, combine melted butter and sugar, whisk until creamy, then add eggs one at a time, followed by vanilla and pumpkin puree.
- Gradually add the dry ingredients to the wet mixture, folding gently until just combined.
- Pour half of the brownie batter into the prepared pan, dollop the remaining batter on top, and swirl with a knife.
- Bake for 25-30 minutes, checking for doneness with a toothpick; it should come out clean or with a few moist crumbs.
- Cool in the pan for 10-15 minutes, then cut into squares and serve.

Leave a Reply