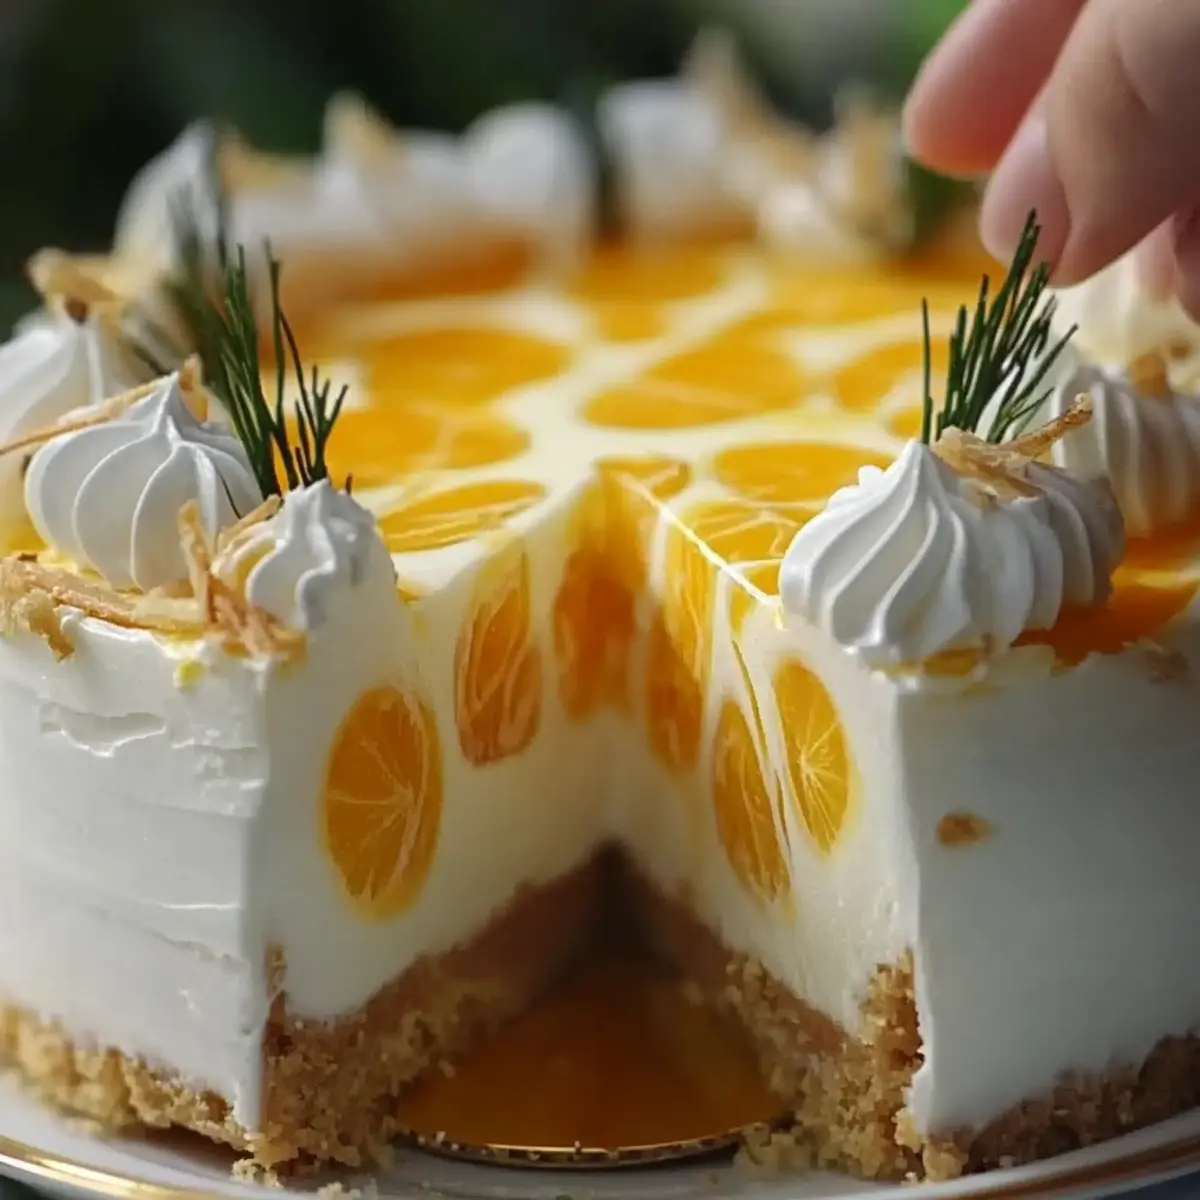
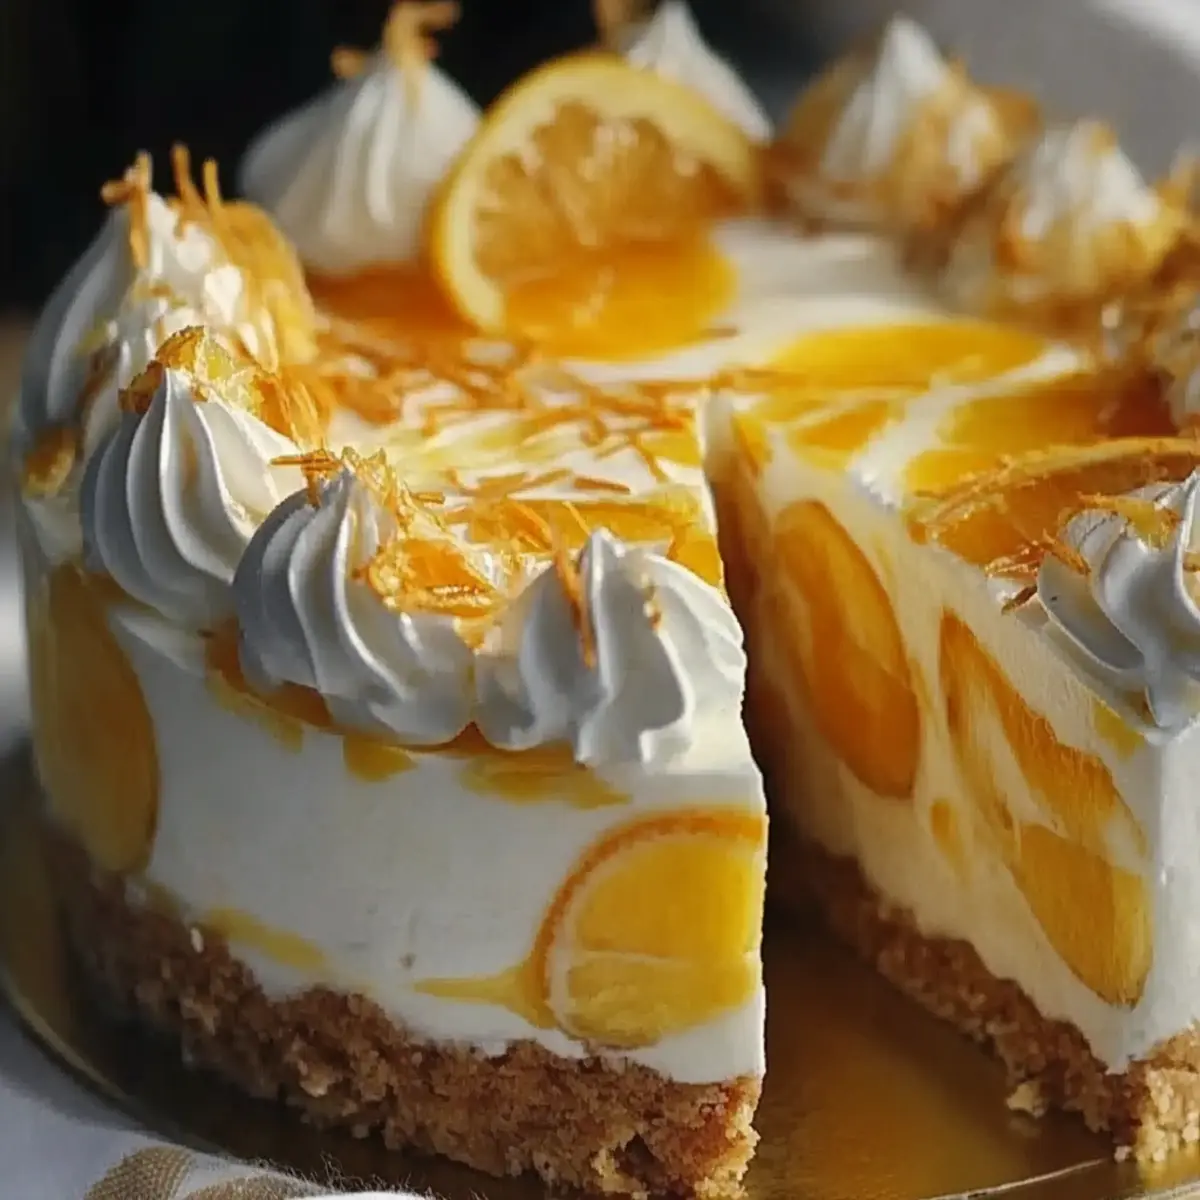
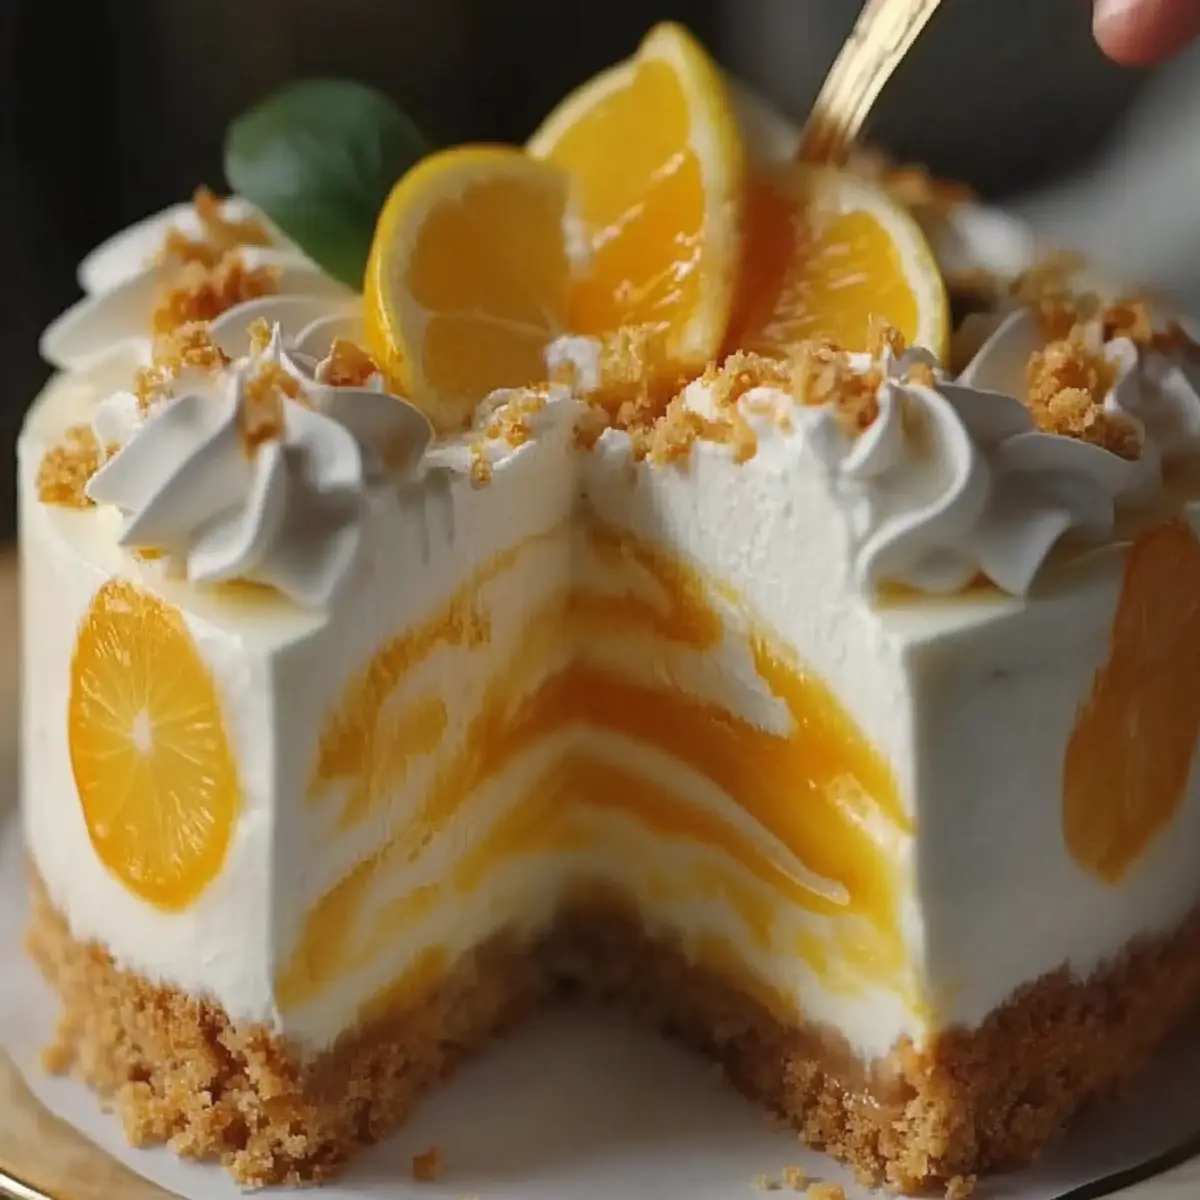
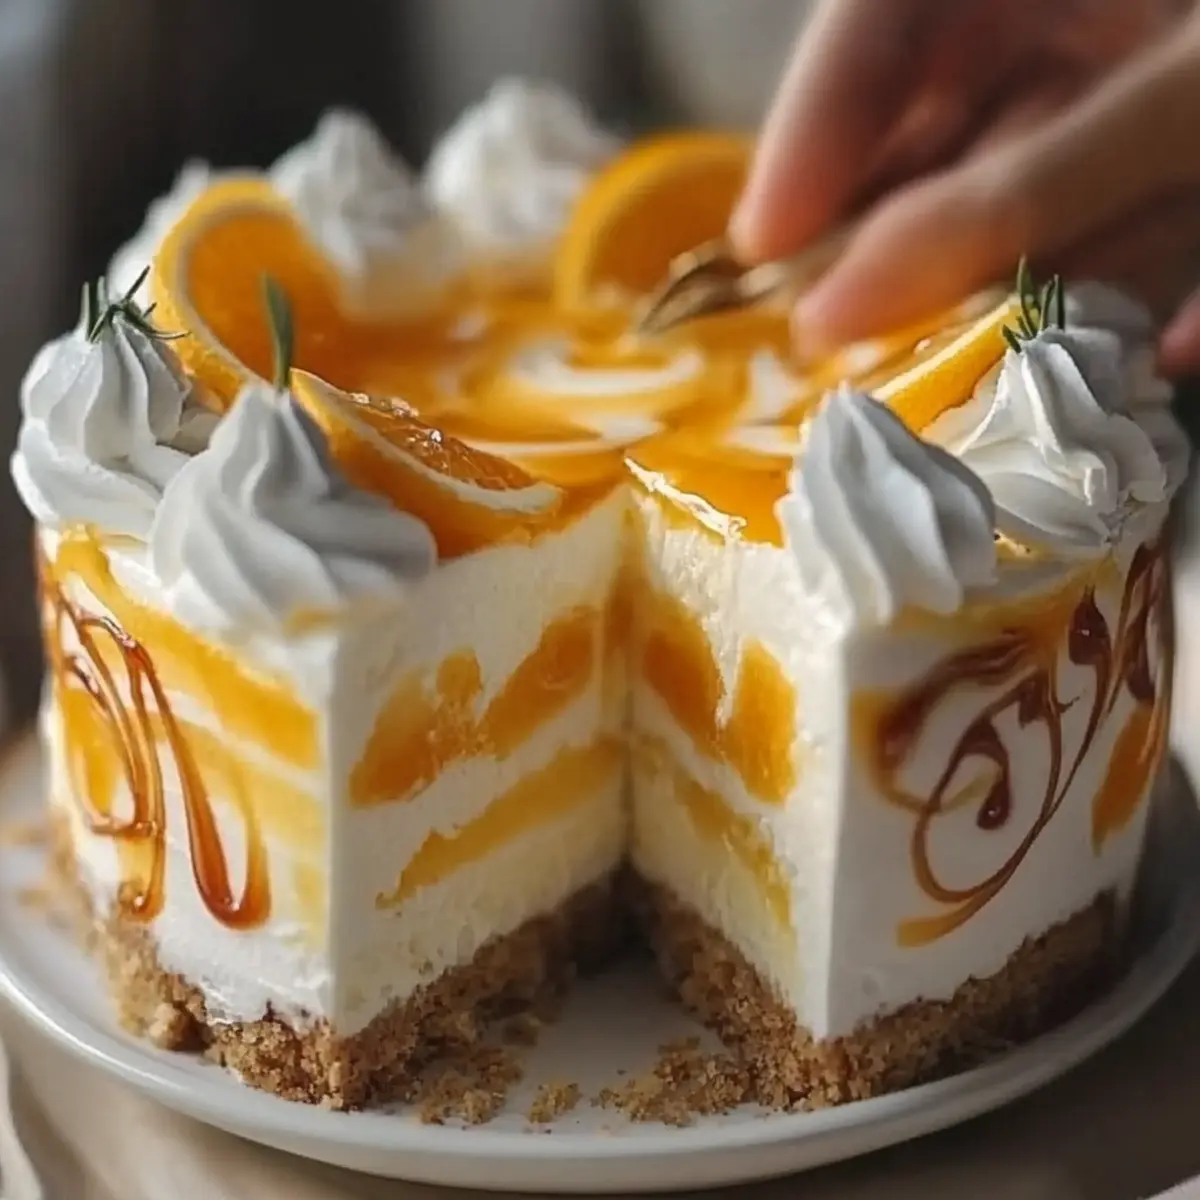
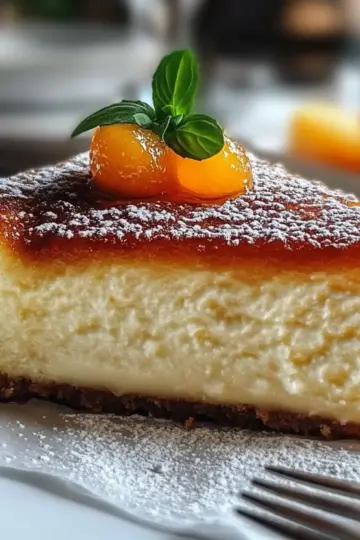
As I stood in my kitchen, a note of nostalgia swept over me—reminding me of sunny days and carefree afternoons spent enjoying dessert with family. Today, I’m excited to share my No Bake Orange Pineapple Cheesecake, a delightful twist on a classic dessert that captures the essence of summer in every bite. This recipe brings together the velvety richness of cream cheese and the bright burst of crushed pineapple, creating an irresistible treat that’s not only a breeze to make but also serves as a delightful crowd-pleaser. Whether you’re entertaining guests or simply treating yourself, this cheesecake is the perfect way to embrace wholesome homemade goodness. Ready to whip up something magical without even turning on the oven? Let’s dive in!
What makes this cheesecake unforgettable?
Irresistible combination: The harmonious blend of cream cheese and tropical pineapple creates a flavor explosion that transports you straight to a beachside paradise.
No baking required: With minimal effort, you can create a stunning dessert that your guests will rave about—perfect for those hot summer days!
Quick prep time: In just 20 minutes, you can have this beauty ready to chill, allowing you more time to enjoy the day.
Crowd-pleaser: This No Bake Orange Pineapple Cheesecake is always a hit, appealing to both kids and adults alike, making it a staple at gatherings.
Refreshing dessert: The light and fluffy texture is the ultimate way to satisfy your sweet tooth without feeling weighed down.
No Bake Orange Pineapple Cheesecake Ingredients
For the Filling
• Crushed pineapple – adds a sweet and tangy burst of flavor that perfectly complements the creaminess of the cheesecake.
• Cream cheese – provides a rich, velvety base that holds everything together; be sure to use it at room temperature for easy mixing.
• Whipped cream – lightens the filling and makes it fluffy, adding a delightful texture to your cheesecake.
• Sugar – balances the flavors; adjust to your taste preference if you prefer a less sweet dessert.
For the Crust
• Graham cracker crumbs – forms the classic crunchy base that contrasts beautifully with the creamy filling; crush them finely for the best texture.
• Butter – binds the crumbs together and adds richness; ensure it’s melted for even mixing.
Enjoy this delicious No Bake Orange Pineapple Cheesecake that is perfect for any occasion!
Step‑by‑Step Instructions for No Bake Orange Pineapple Cheesecake
Step 1: Prepare the Filling
In a large mixing bowl, combine the crushed pineapple, cream cheese, and sugar. Use an electric mixer on medium speed to blend until smooth and creamy, which should take about 2-3 minutes. Ensure there are no lumps for a velvety texture, making your No Bake Orange Pineapple Cheesecake truly delightful.
Step 2: Incorporate the Whipped Cream
Gently fold in the whipped cream with a spatula until fully incorporated, taking care not to deflate the mixture. This step adds lightness to the filling, resulting in a fluffy consistency. Aim for an even blend, and give it a quick taste to ensure the sweetness is just right!
Step 3: Prepare the Crust
In another bowl, mix together the graham cracker crumbs and melted butter until all the crumbs are evenly coated. The mixture should clump together slightly. This will form the crunchy base for your cheesecake, so take a moment to ensure it is well mixed.
Step 4: Form the Crust
Press the graham cracker mixture firmly into the bottom of a pie dish using the back of a measuring cup or your fingers. Aim to create an even layer that covers the entire bottom. This crust will provide a satisfying crunch when you indulge in your No Bake Orange Pineapple Cheesecake.
Step 5: Add the Filling
Carefully pour the cream cheese filling over the prepared crust, using a spatula to spread it into an even layer. Ensure the filling reaches all edges of the crust for a beautiful presentation. This will bring together the creamy goodness of the cheesecake with the crunchy base perfectly.
Step 6: Chill the Cheesecake
Cover the pie dish with plastic wrap and place it in the refrigerator. Let it chill for at least 4 hours, or until set. This not only helps the flavors meld but also firms up the cheesecake, making it easier to slice and serve. The anticipation will be worth it once it's ready!
No Bake Orange Pineapple Cheesecake Variations
Get ready to make this cheesecake your own with these delicious twists!
-
Vegan Option: Substitute cream cheese with cashew cream and use coconut whipped cream for a delightful dairy-free version. The tropical flavors still shine through, making it perfect for everyone.
-
Fruit Fusion: Mix in diced strawberries or mango with the crushed pineapple for a fruit medley that adds even more tropical flair. The blend of colors and flavors will light up your dessert table!
-
Nutty Crust: Swap graham cracker crumbs for crushed almonds or pecans for an added crunch and richness. This twist will introduce a lovely nutty flavor to complement the cheesecake.
-
Coconut Kick: Add shredded coconut to both the filling and crust for an extra tropical burst. With every bite, you’ll feel like you’re on a beach vacation.
-
Zesty Lime: Incorporate lime zest into the filling for a refreshing twist that balances sweetness with a tart bite. It’s a zingy surprise that invigorates every slice!
-
Chocolate Drizzle: Top the cheesecake with a chocolate ganache or drizzle melted chocolate just before serving for a decadent chocolatey addition. Just imagine that luscious contrast against the fruity flavors.
-
Spiced Sensation: Sprinkle in a pinch of cinnamon or nutmeg to the filling for a warm, comforting flavor that makes your cheesecake feel even more inviting. A subtle touch can make a world of difference!
-
Spicy Kick: For those who enjoy a bit of heat, add a dash of cayenne pepper to the crust for an unexpected spicy twist. It’s a fun way to awaken the taste buds while enjoying a sweet dessert!
How to Store and Freeze No Bake Orange Pineapple Cheesecake
Fridge: Keep the cheesecake in an airtight container for up to 3 days. This prevents it from absorbing odors and maintains its delightful flavors.
Freezer: For longer storage, freeze slices wrapped tightly in plastic wrap, followed by aluminum foil, for up to 2 months. Thaw in the fridge overnight before serving.
Reheating: Since this cheesecake is served cold, there's no need to reheat. Simply let it sit at room temperature for about 15 minutes before slicing for the best texture.
Leftovers: To enjoy leftover slices, garnish with a bit of whipped cream and fresh fruit just before serving, enhancing the beauty of your No Bake Orange Pineapple Cheesecake!
Make Ahead Options
These No Bake Orange Pineapple Cheesecake delights are perfect for meal prep enthusiasts! You can prepare the cream cheese filling up to 24 hours in advance; simply mix the crushed pineapple, cream cheese, and sugar, then fold in the whipped cream, and store it in an airtight container in the fridge to maintain its freshness and prevent deflation. The graham cracker crust can also be made ahead; just mix the crumbs and melted butter, press it into the dish, and refrigerate it until you’re ready to assemble. When it’s time to serve, pour the prepared filling into the crust, chill for at least 4 hours or overnight, and enjoy a crowd-pleasing dessert with minimal last-minute effort!
Expert Tips for No Bake Orange Pineapple Cheesecake
-
Use Room Temperature Ingredients: Let your cream cheese sit at room temperature for about 30 minutes. This makes mixing easier and ensures a smoother filling.
-
Be Gentle When Folding: When incorporating the whipped cream, fold gently to maintain that airy texture. Overmixing will make the cheesecake dense instead of light and fluffy.
-
Balance the Sweetness: Taste the filling before pouring it on the crust. If it's too sweet, consider reducing the sugar next time for a more balanced flavor.
-
Even Crust Layer: Press the graham cracker mixture firmly and evenly into the pie dish. An uneven crust can lead to crumbling when you slice your No Bake Orange Pineapple Cheesecake.
-
Chill Thoroughly: Allow the cheesecake to set for at least 4 hours; overnight is even better. This helps the flavors develop and ensures clean slices when serving.
What to Serve with No Bake Orange Pineapple Cheesecake
Elevate your dessert experience by pairing this delightful cheesecake with these perfect accompaniments that celebrate the flavors of summer.
-
Fresh Berries: Juicy strawberries or blueberries provide a burst of sweetness that complements the creamy tang of the cheesecake. Their bright colors also add a vibrant touch to your plate.
-
Mint Leaves: A sprinkle of fresh mint adds a refreshing herbal note that balances the rich richness of the cheesecake. Plus, it enhances the entire presentation with a touch of elegance.
-
Coconut Whipped Cream: Add a tropical flair with a silky coconut whipped cream topping. Its lightness harmonizes beautifully with the cheesecake’s texture, enhancing each mouthful.
-
Lemon Sorbet: The zesty chill of lemon sorbet offers a refreshing contrast and helps cleanse the palate between bites. It’s a perfect way to enjoy a sweet finish with a tangy twist.
-
Pineapple Chunks: Serve some fresh pineapple alongside for a fruity contrast. The tropical flavor echoes the cheesecake, reinforcing its lusciousness while providing a delightful crunch.
-
Sparkling Water: A glass of chilled sparkling water adds a refreshing effervescence to your meal. It’s a light choice that won’t overshadow the delicious flavors of the dessert.
-
Iced Tea: A subtly sweetened iced tea pairs wonderfully with the cheesecake, providing a cooling beverage option that adds to the relaxation of your summer gatherings.
Each of these pairings brings its own unique flavor and texture to your dessert experience, making your No Bake Orange Pineapple Cheesecake even more memorable!
No Bake Orange Pineapple Cheesecake Recipe FAQs
How do I choose ripe pineapple for this recipe?
Absolutely! For the best flavor, look for a fresh pineapple that gives off a sweet aroma. The skin should be mostly golden yellow with a slight yield when gently pressed. Avoid bruised or overly soft spots, which indicate overripeness. If using canned pineapple, choose chunks or crushed in 100% juice for the freshest taste!
What’s the best way to store the cheesecake, and how long does it last?
Very good question! Store your No Bake Orange Pineapple Cheesecake in an airtight container in the refrigerator for up to 3 days. If you're keeping it for longer, consider freezing it. Just be sure to wrap individual slices tightly to preserve quality and flavor.
Can I freeze the No Bake Orange Pineapple Cheesecake?
Yes, you can! To freeze, wrap each slice tightly in plastic wrap, then cover it with aluminum foil. This ensures protection against freezer burn. Your cheesecake can be frozen for up to 2 months. When ready to enjoy, simply place the slices in the refrigerator overnight to thaw; this will retain its creaminess.
What if my whipped cream doesn’t hold?
If your whipped cream isn’t holding up, make sure you’re using heavy whipping cream that’s very cold. Whip it until it reaches stiff peaks, checking closely to avoid overmixing. If you find it too runny before folding into the filling, you can add a tablespoon of cornstarch or powdered sugar to stabilize it.
Is this cheesecake safe for pets or those with allergies?
Definitely check! This No Bake Orange Pineapple Cheesecake contains dairy and sugar, which are not suitable for cats and dogs. If you’re worried about allergies, ensure that no one in your party has sensitivities to dairy or gluten, as this recipe includes cream cheese and graham crackers. Always consult with those guests to be safe!
Can I use other fruits?
Absolutely! While this recipe shines with pineapple, feel free to substitute with other fruits like strawberries, mangoes, or even blueberries for a delightful twist. Just make sure to adjust the sweetness since different fruits have varying levels of natural sugars!
Indulgent No Bake Orange Pineapple Cheesecake Delight
Ingredients
Equipment
Method
- In a large mixing bowl, combine the crushed pineapple, cream cheese, and sugar. Use an electric mixer on medium speed to blend until smooth and creamy, about 2-3 minutes.
- Gently fold in the whipped cream with a spatula until fully incorporated, being careful not to deflate the mixture.
- In another bowl, mix together the graham cracker crumbs and melted butter until evenly coated.
- Press the graham cracker mixture firmly into the bottom of a pie dish to form an even layer.
- Pour the cream cheese filling over the prepared crust, spreading it into an even layer.
- Cover the pie dish with plastic wrap and refrigerate for at least 4 hours, or until set.

Leave a Reply