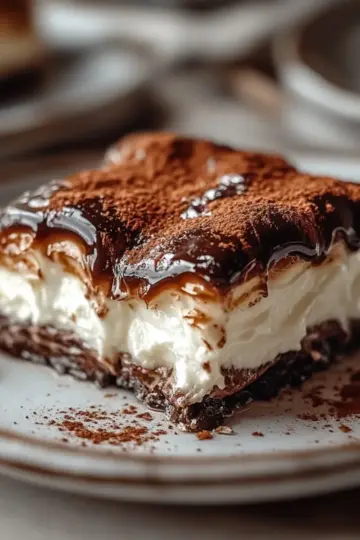
There I was, staring at a bunch of overly ripe bananas on my kitchen counter, wondering how to transform them into something delicious without turning on the oven. That’s when it hit me: a dreamy Banana Pudding No Bake Dessert! This recipe is a total game-changer, bringing together creamy layers of banana pudding, whipped cream cheese, and soft Nilla Wafers—all without breaking a sweat in the kitchen. With just 20 minutes of prep time and a chill phase that allows for the flavors to marry beautifully, it’s a perfect solution for busy weeknights or surprise guests. Plus, it’s a crowd-pleaser that will have everyone coming back for seconds! Are you ready to indulge in this delightful, no-bake masterpiece? Let’s dive into the sweet-making magic!
Why is this Banana Pudding so Special?
No-Bake Delight: This recipe skips the oven, making it a hassle-free treat perfect for hot days or busy schedules.
Creamy Layers: With a luscious mix of cream cheese and banana pudding, each bite is a creamy dream layered with fresh bananas and Nilla Wafers.
Quick Prep: You can whip this up in just 20 minutes, allowing you to spend more time enjoying dessert, not making it.
Crowd-Pleasing: Whether for family dinners or unexpected guests, this dessert is guaranteed to impress and satisfy sweet cravings.
Easy Customization: Feel free to add a sprinkle of cinnamon or chocolate to personalize this dish, catering to your unique taste!
Banana Pudding No Bake Dessert Ingredients
For the Cream Layer
• 8 ounce block cream cheese – softened to room temperature for the creamiest texture.
• 5.1 ounces box instant banana pudding – this is the star ingredient that infuses that lovely banana flavor.
• 3 cups whole milk – helps to create a smooth pudding consistency that complements the cream cheese.
• 8 ounce tub whipped topping – thawed, for a light and airy finish that balances the richness.
For the Assembly
• 11 ounce box Nilla Wafers – these iconic cookies add delightful crunch and sweetness to every layer.
• 5 ripe bananas – sliced, for the freshest taste and a beautiful layer of natural sweetness in your dessert.
Enjoy making your Banana Pudding No Bake Dessert! The blend of creamy, crunchy, and fruity elements will undoubtedly make this treat a family favorite.
Step‑by‑Step Instructions for Banana Pudding No Bake Dessert
Step 1: Whip Cream Cheese
In a large mixing bowl, add the softened cream cheese. Using an electric hand mixer, whip it on medium speed for about 2-3 minutes until it reaches a smooth, creamy consistency. Scrape down the sides of the bowl as needed, and once fully blended, set it aside to become the flavorful layer in your Banana Pudding No Bake Dessert.
Step 2: Combine Pudding and Milk
In another bowl, combine the instant banana pudding mix with the whole milk. Whisk vigorously for 2 minutes until well combined and slightly thickened. The mixture should achieve a pouring consistency. This banana pudding will be the heart of your no-bake dessert, so make sure there are no lumps for a silky texture.
Step 3: Mix Together Cream Cheese and Pudding
Carefully fold the banana pudding mixture into the whipped cream cheese until fully integrated. Use a spatula for gentle mixing, ensuring the mixture remains light and fluffy. The colors should be uniform, and you should see a perfect amalgamation of the pudding and cream, forming the dreamy filling for your Banana Pudding No Bake Dessert.
Step 4: Prepare the Baking Dish
Take a 2.5-quart baking dish and line its bottom with a layer of Nilla Wafers. Arrange them in a single, even layer, covering the base completely. This will provide a perfect crunch and a familiar flavor. Get creative with the arrangement, ensuring that generously spaced wafers will hold up wonderfully against the creamy layers above.
Step 5: First Layer of Pudding Mixture
Spread one-third of the creamy pudding mixture evenly over the layer of Nilla Wafers in the dish. Use a spatula to smooth it out so it covers all the cookies. The creamy layer should sit nicely atop the wafers, merging the crunchiness with the creaminess as you build your luscious Banana Pudding No Bake Dessert.
Step 6: Add Sliced Bananas
Now, layer the sliced bananas over the pudding mixture. Aim for an even coverage with the banana slices, creating a visually appealing layer of natural sweetness. The bananas will add a fresh flavor and beautiful color, enhancing the overall appeal of your dessert while providing delightful bites throughout the layers.
Step 7: Repeat the Layering Process
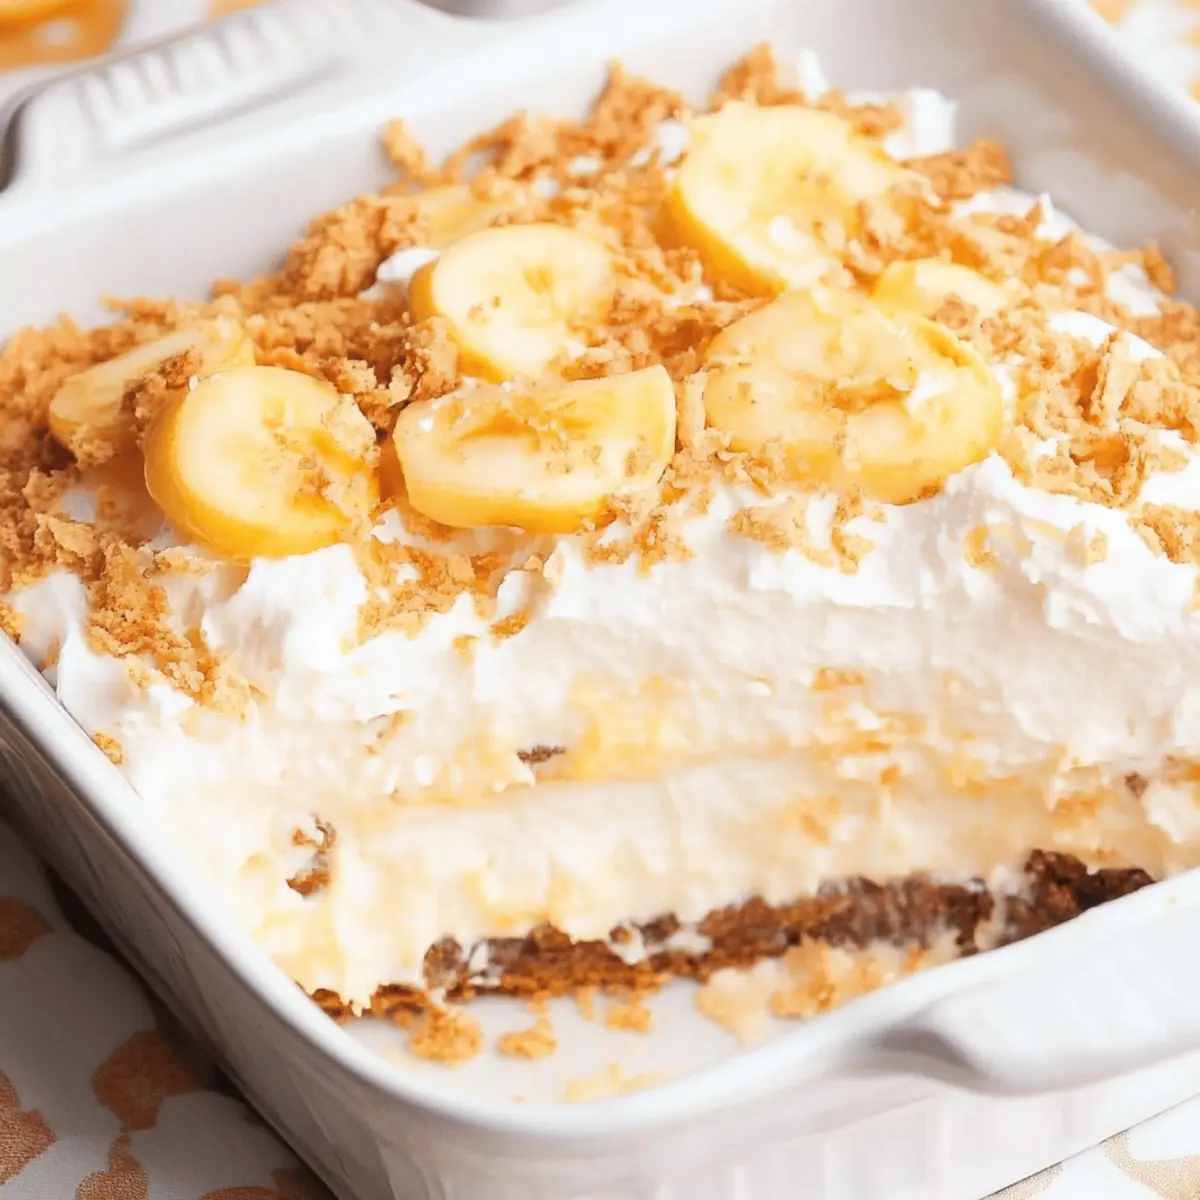
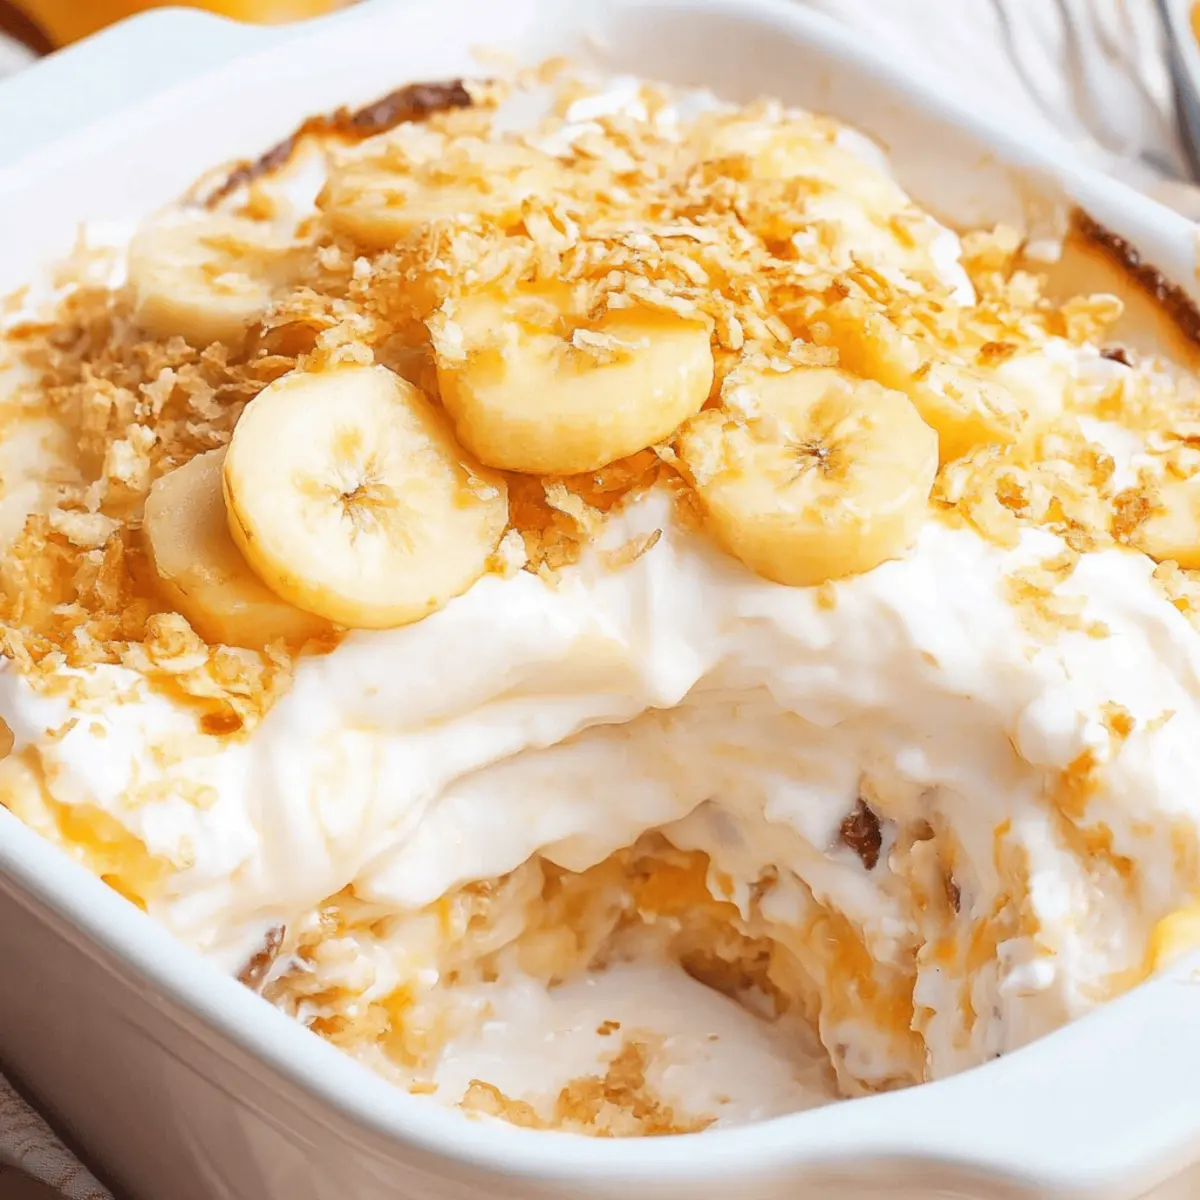
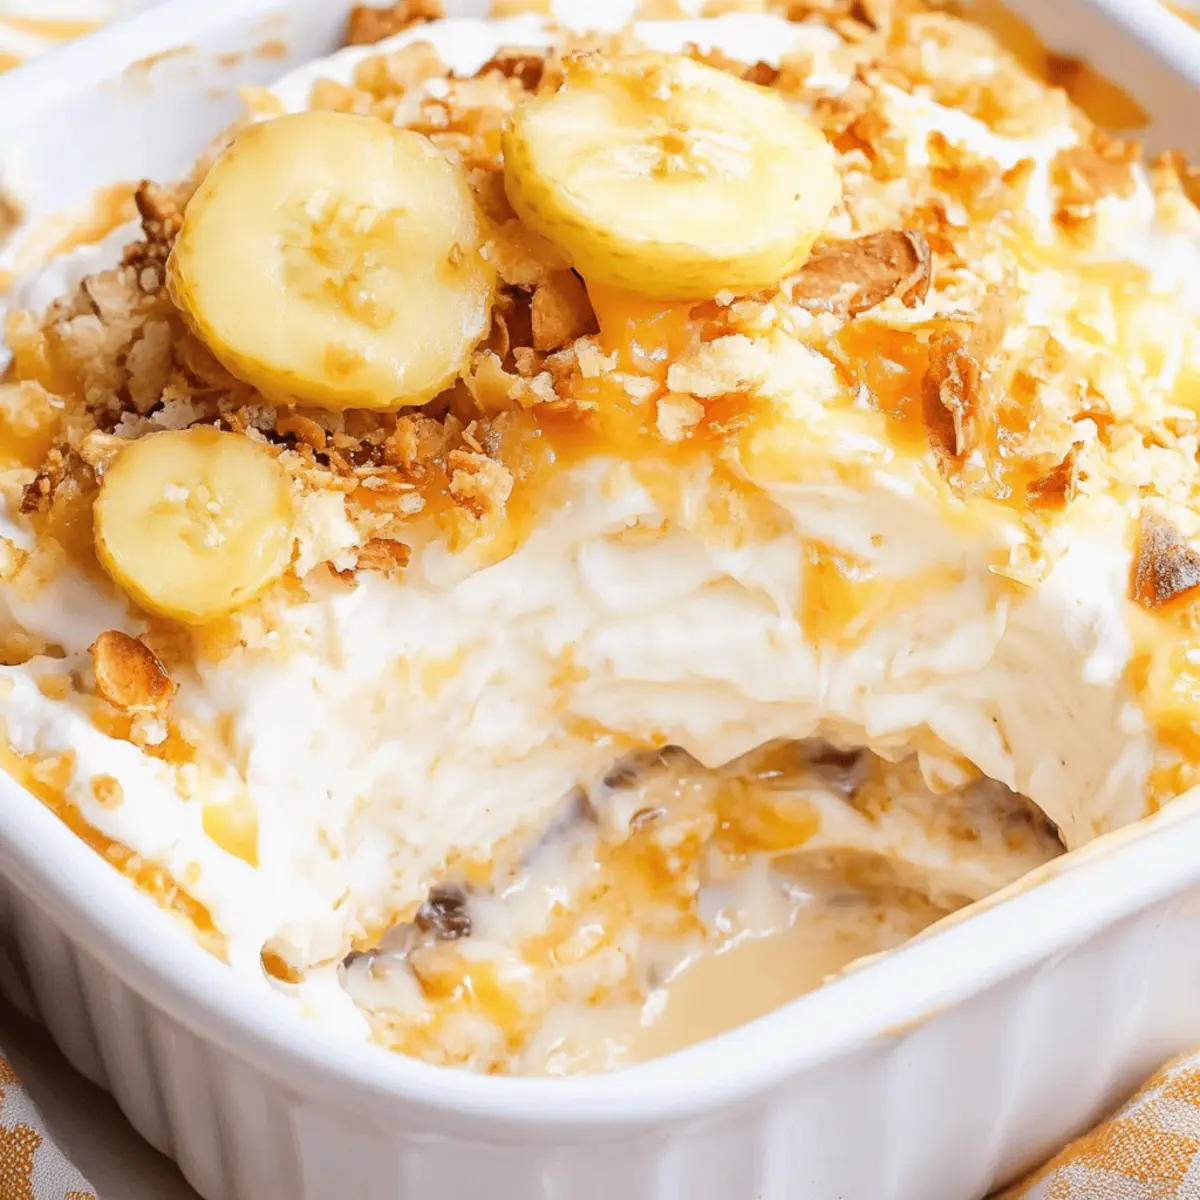
Repeat the layering process two more times, starting with another layer of Nilla Wafers, followed by more pudding mixture, and topping with more sliced bananas. Make sure each layer is consistent in thickness and evenly distributed. This will result in a stunning multi-layered presentation of your Banana Pudding No Bake Dessert.
Step 8: Top with Whipped Topping
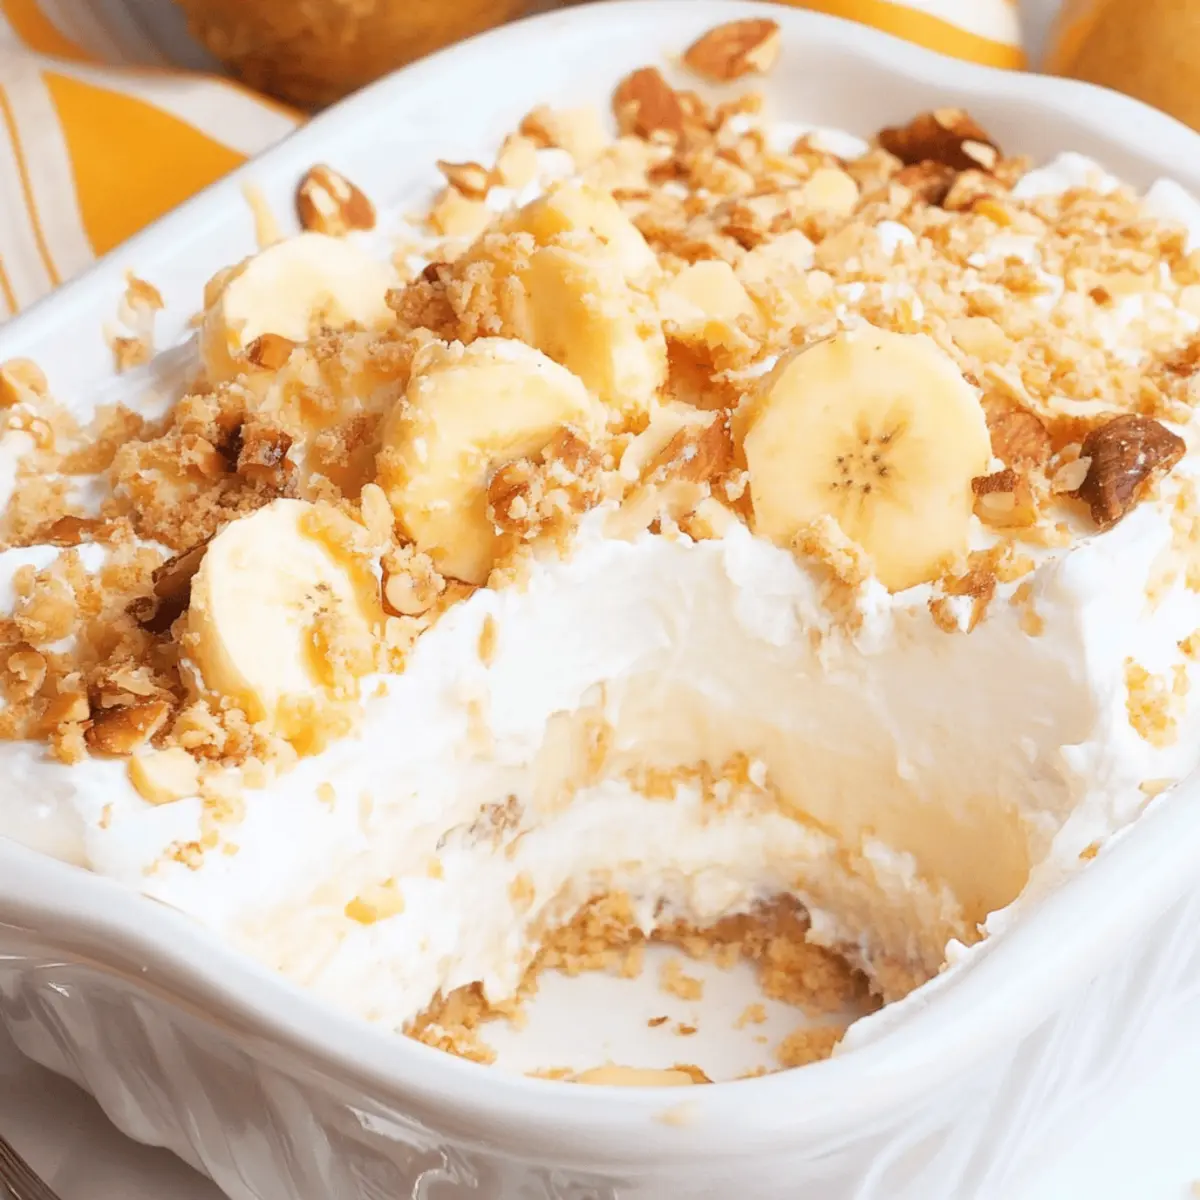
Once all layers are assembled, take the thawed whipped topping and spread it evenly on the top layer of bananas. Spread it gently to cover any exposed bananas and pudding, creating a beautiful, fluffy finishing touch. This whipped topping will add a lightness to the dessert, balancing the richness of the layers beneath.
Step 9: Chill in the Refrigerator
Cover the baking dish with plastic wrap and place it in the refrigerator. Let the Banana Pudding No Bake Dessert chill for at least 1 hour—preferably 2 hours or even overnight. This chilling time allows the flavors to meld together and the Nilla Wafers to soften, becoming the perfect texture in your delicious dessert.
Step 10: Optional Garnish Before Serving
If desired, before serving, crush a few Nilla Wafers and sprinkle them on top for an extra crunch. This will add visual interest and a final touch to your Banana Pudding No Bake Dessert. Get ready to enjoy your delightful creation, packed with layers of creamy, crunchy goodness!
Expert Tips for Banana Pudding No Bake Dessert
Perfect Cream Cheese: Make sure your cream cheese is softened to room temperature for a smooth, lump-free mixture that blends perfectly with the pudding.
Layer Wisely: You want to create even layers of Nilla Wafers, pudding, and bananas to ensure every bite is consistent and delightful. Don’t skimp on the layering!
Banana Freshness: Use ripe bananas for the best flavor, but avoid overripe bananas that can turn mushy. Check for slight softness for optimal sweetness.
Chill Time Matters: Allow the Banana Pudding No Bake Dessert to chill longer than one hour if possible. Overnight chilling provides an even richer taste as flavors meld beautifully.
Garnish for Crunch: Don't forget to sprinkle crushed Nilla Wafers on top before serving for an attractive finish and added texture!
What to Serve with Banana Pudding No Bake Dessert
Create the perfect ending to a delightful meal with these delicious pairings that enhance the allure of your sweet creation.
- Creamy Mashed Potatoes: Their velvety texture and hearty flavor provide a comforting contrast to the lightness of the dessert.
- Grilled Chicken: A touch of savory grilled chicken pairs wonderfully, balancing the sweetness of the banana pudding. This combo is both satisfying and delicious!
- Fresh Fruit Salad: With bright colors and juicy sweetness, a refreshing fruit salad elevates your meal, preparing your palate for that indulgent dessert.
- Chocolate Chip Cookies: A classic favorite, they add a crunchy texture and rich flavor that blends seamlessly with the soft, creamy pudding.
- Homemade Lemonade: This zesty drink offers a crisp, refreshing kick that contrasts beautifully with the sweet dessert. Perfect for any gathering!
- Vanilla Ice Cream: Creamy vanilla ice cream served alongside warms up the flavors and adds a delightful chill to each bite, making it an irresistible duo.
- Coconut Cake: The light, tropical flavor of coconut cake complements the banana notes, creating a delicious harmony of tastes that everyone will love.
- Sparkling Water with Lime: The bubbly, citrusy refreshment cleanses the palate, making every spoonful of banana pudding feel rejuvenating and special.
- Chocolate Lava Cake: For the chocolate lovers, this rich and gooey cake provides an elegant contrast, ensuring a well-rounded dessert experience that's hard to resist.
How to Store and Freeze Banana Pudding No Bake Dessert
Fridge: Keep your Banana Pudding No Bake Dessert covered in the refrigerator for up to 3 days. This allows the flavors to meld beautifully while keeping it fresh and creamy.
Freezer: You can freeze individual servings for up to 1 month. Wrap them tightly in plastic wrap, then place them in an airtight container to prevent freezer burn.
Thawing: To enjoy, thaw your frozen dessert in the refrigerator overnight. After thawing, give it a gentle stir to restore its creamy texture before serving.
Serving Suggestions: Serve chilled directly from the fridge, and consider adding a sprinkle of extra Nilla Wafers on top for a crunchy finish!
Banana Pudding No Bake Dessert Twists
Indulge your creativity by personalizing this delightful dessert with these fun variations and substitutions!
-
Dairy-Free: Swap out cream cheese and whipped topping with cashew cream and coconut whipped cream for a lactose-free option.
Embrace the dreamy richness of cashew cream paired with the tropical notes of coconut. This twist keeps the lusciousness intact while being kinder to those avoiding dairy. -
Cinnamon Boost: Add a teaspoon of ground cinnamon to the pudding mixture for a warm, spicy note.
This subtle spiciness complements the sweetness of bananas beautifully, giving each bite a comforting flavor reminiscent of autumn. -
Chocolate Lovers: Incorporate chocolate pudding mix instead of banana pudding for a chocolatey twist.
Layering a chocolate twist adds an extra layer of indulgence that both kids and adults will adore—chocolate and bananas are a match made in dessert heaven! -
Nutty Crunch: Toss in a handful of chopped walnuts or pecans between the layers for added texture.
The delightful crunch of nuts will not only elevate the flavor but also introduce a satisfying contrast to the creamy pudding layers. -
Banana Fosters: Sauté banana slices in a bit of brown sugar and butter before layering them for a caramelized flavor.
This luxurious twist will enhance the banana flavor, adding a touch of gourmet flair that feels fancy yet remains unfussy. -
Fresh Fruit Medley: Swap out or add fresh berries in place of some banana layers to introduce a burst of color and tanginess.
Strawberries, raspberries, or blueberries provide a refreshing pop and beautiful visual appeal, creating a stunning presentation. -
Spicy Kick: Consider adding a pinch of cayenne pepper to the pudding mix for a surprising kick.
This unexpected heat can elevate your dessert and balance the sweetness in a way that tantalizes the taste buds. -
Granola Layer: Replace Nilla Wafers with granola for a healthier, crunchy base.
This swap adds an enjoyable crunch and wholesome elements, making every bite a bit more nutritious while still satisfying that crunchy craving.
Make Ahead Options
These Banana Pudding No Bake Desserts are perfect for busy home cooks looking to save time! You can prepare the creamy filling and layer the dessert up to 24 hours in advance; simply cover and refrigerate it. To ensure the best quality, keep the sliced bananas separate and add them just before serving, as this will prevent browning and maintain their freshness. Moreover, you can also crush Nilla Wafers and store them in an airtight container until you’re ready to garnish. When it’s time to indulge, just top with whipped topping and enjoy your delicious, stress-free dessert that’s still just as delightful as if made fresh!
Banana Pudding No Bake Dessert Recipe FAQs
How do I know if my bananas are ripe enough for the recipe?
Absolutely! You want bananas that are slightly soft and have a few brown spots. This indicates that they are sweet and flavorful. However, avoid overripe bananas that are too mushy, as they can create an undesirable texture in your dessert.
How should I store my Banana Pudding No Bake Dessert?
Very simply! Store the dessert covered in the refrigerator for up to 3 days. Make sure it’s well-covered to keep it fresh and prevent it from absorbing other fridge odors.
Can I freeze leftovers of the Banana Pudding No Bake Dessert?
Yes, you can freeze it! I often freeze individual servings. Wrap them tightly in plastic wrap and then place them in an airtight container to avoid freezer burn. This allows for up to 1 month of tasty treats!
What’s the best way to thaw frozen Banana Pudding No Bake Dessert?
To thaw, simply move the frozen dessert to the refrigerator the night before you plan to enjoy it. Once thawed, give it a gentle stir to restore its creamy consistency that you love!
What common issues should I watch for when making this dessert?
If you notice lumps in your cream cheese, make sure it’s at room temperature before mixing. For the pudding, whisk thoroughly; lumps will detract from the creamy texture. Lastly, layering inconsistencies can lead to uneven bites, so take your time to layer evenly.
Are there any dietary considerations I should keep in mind?
Definitely! This recipe contains dairy, so it’s not suitable for lactose-intolerant individuals. You can opt for lactose-free cream cheese and pudding mix to make it a bit more inclusive, and always check for potential allergens in your whipped topping and Nilla Wafers if serving to guests with food sensitivities.
Indulgent Banana Pudding No Bake Dessert You’ll Love
Ingredients
Equipment
Method
- In a large mixing bowl, add the softened cream cheese. Using an electric hand mixer, whip it on medium speed for about 2-3 minutes until it reaches a smooth, creamy consistency.
- In another bowl, combine the instant banana pudding mix with the whole milk. Whisk vigorously for 2 minutes until well combined and slightly thickened.
- Carefully fold the banana pudding mixture into the whipped cream cheese until fully integrated.
- Take a 2.5-quart baking dish and line its bottom with a layer of Nilla Wafers.
- Spread one-third of the creamy pudding mixture evenly over the layer of Nilla Wafers in the dish.
- Layer the sliced bananas over the pudding mixture, aiming for an even coverage.
- Repeat the layering process two more times, starting with another layer of Nilla Wafers, followed by more pudding mixture, and topping with more sliced bananas.
- Once all layers are assembled, spread the thawed whipped topping evenly on the top layer of bananas.
- Cover the baking dish with plastic wrap and place it in the refrigerator. Let it chill for at least 1 hour—preferably 2 hours or even overnight.
- If desired, before serving, crush a few Nilla Wafers and sprinkle them on top for an extra crunch.

Leave a Reply