As the savory aroma of melted cheese and warm chili fills my kitchen, I can’t help but feel like a culinary wizard conjuring up something truly delightful. Today, I’m excited to share my take on the ultimate comfort food: Chili Cheese Fries. This recipe strikes that perfect balance between indulgence and nostalgia, making it an instant hit for anyone craving a heartwarming treat without the hassle of takeout. It’s quick to whip up—just 35 minutes from start to finish—and is sure to please even the fussiest eaters at your table. Imagine crispy fries smothered in cheesy chili goodness, topped off with a cool dollop of sour cream and fresh green onions. What’s not to love? So, are you ready to dive into this delicious creation?
Why are Chili Cheese Fries irresistible?
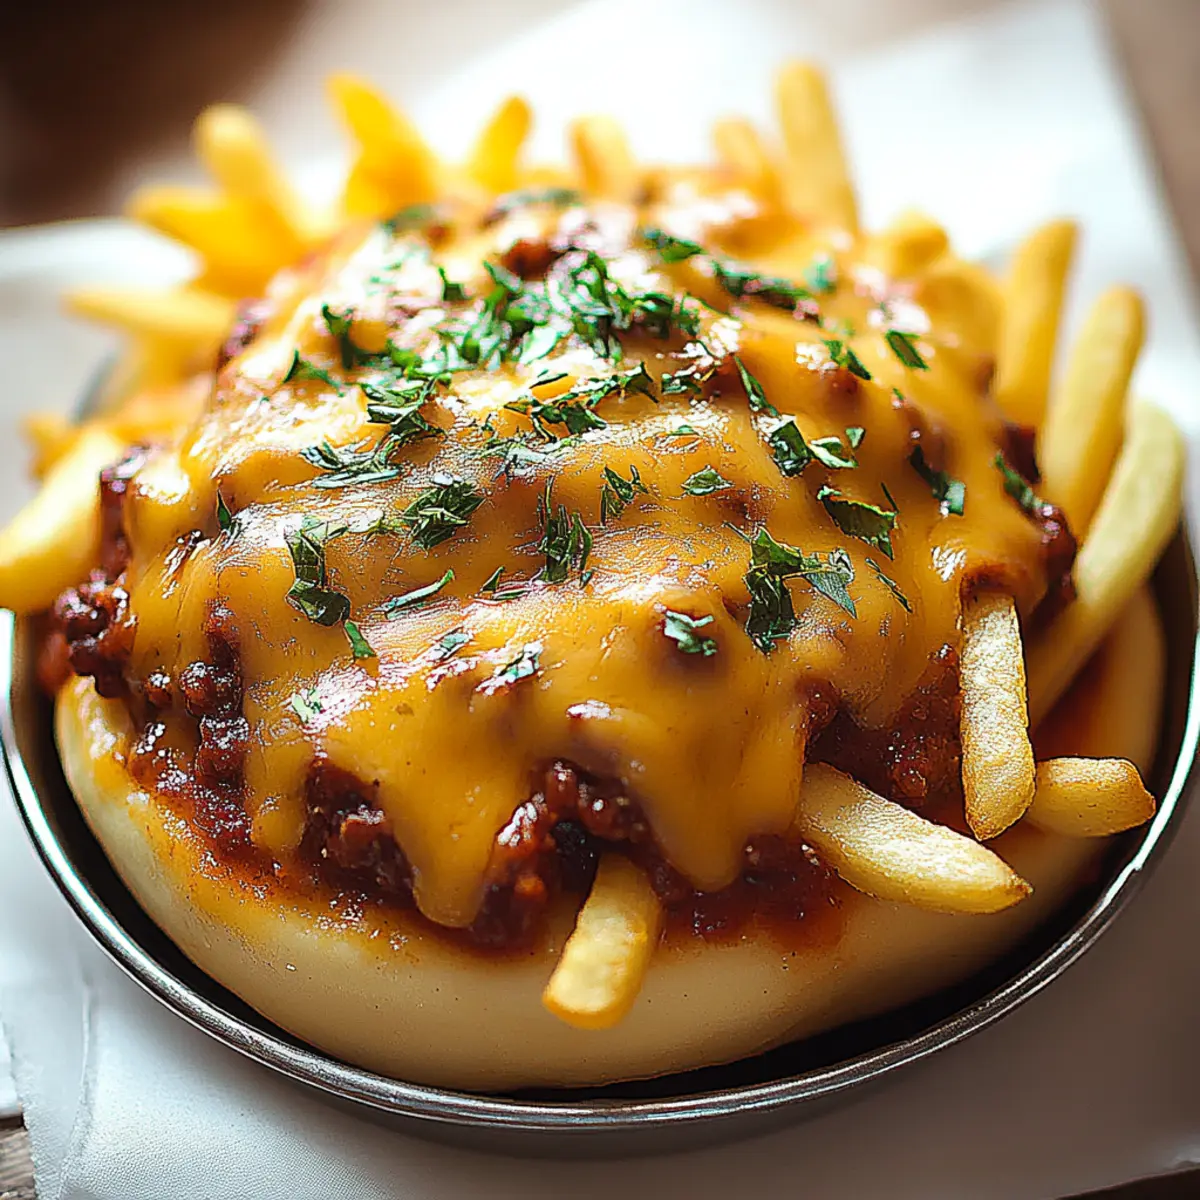
Comforting and satisfying, these Chili Cheese Fries will warm your heart and your taste buds. Simple to make, this dish requires just a few ingredients and minimal prep time. Decadent layers of cheese and chili create a flavor explosion unlike anything you’d find in fast food. Versatile enough for gatherings or cozy nights in, it’s perfect for sharing or indulging alone. Time-saving and delicious, you’ll love how quickly these come together, making them a weeknight favorite to please everyone!
Chili Cheese Fries Ingredients
Get ready to create the ultimate comfort food masterpiece!
For the Fries
• Frozen French fries – the base of this indulgent dish, crispy and golden brown is key!
For the Chili Topping
• Chili – a can of your favorite chili adds a rich, savory depth that complements the fries perfectly.
• Shredded cheddar cheese – provides that melty goodness that binds everything together in cheesy harmony!
For the Finishing Touches
• Sour cream – a cool dollop balances the heat and richness, creating a delicious contrast.
• Chopped green onions – adds a fresh, mild crunch that elevates the dish.
• Sliced jalapeños (optional) – for a spicy kick, these optional toppings can take your Chili Cheese Fries to the next level!
Dive into this delicious journey of flavors and textures with these simple yet satisfying ingredients for your Chili Cheese Fries!
Step‑by‑Step Instructions for Chili Cheese Fries
Step 1: Preheat and Bake Fries
Preheat your oven according to the frozen fries package instructions, usually around 425°F. Spread a pound of fries evenly in a single layer on a baking sheet. Bake them for about 20-25 minutes, or until they are golden brown and crispy, stirring halfway through for even cooking.
Step 2: Heat the Chili
While the fries are baking, pour your can of chili into a medium saucepan over medium heat. Stir the chili occasionally as it warms up, which should take about 5-7 minutes. You'll know it’s ready when it’s heated throughout and starting to bubble gently.
Step 3: Mix in Cheese
Once the chili is warmed, sprinkle in 2 cups of shredded cheddar cheese. Stir the mixture continuously until the cheese melts completely, resulting in a creamy and cheesy chili topping. This should only take a few minutes, and you’ll see it transform into a deliciously gooey consistency.
Step 4: Assemble the Chili Cheese Fries
When the fries are perfectly crispy, remove them from the oven and layer them onto a serving platter. Pour the cheesy chili generously over the hot fries, ensuring every fry is coated in that rich, savory goodness.
Step 5: Add Toppings
To finish your Chili Cheese Fries, add a dollop of sour cream right on top. Next, sprinkle with chopped green onions for a refreshing crunch, and if you're feeling adventurous, add sliced jalapeños for an extra kick.
Step 6: Serve Immediately
Serve your Chili Cheese Fries immediately while they’re hot and the cheese is bubbly. Watch as your family dives into this comforting dish that combines crispy fries and rich, cheesy chili, making it an unforgettable treat!

Tips for the Best Chili Cheese Fries
-
Bake Fries Perfectly: Always bake the fries as directed; undercooking can leave them soggy. Aim for a crispy texture to complement the toppings.
-
Choose Quality Chili: Opt for a flavorful chili that you enjoy eating alone. A mediocre chili can dull the excitement of your Chili Cheese Fries.
-
Melt Cheese Thoroughly: Stir steadily as you mix in the cheese to prevent clumps. A smooth, melted cheese blend creates the ultimate gooey delight.
-
Layer Wisely: For maximum flavor, don’t skimp on the chili and cheese layers! Generously pour both to ensure every fry gets its fair share.
-
Enjoy Fresh: Serve your Chili Cheese Fries immediately to savor them at their best. The crunch of the fries and the warmth of the chili are key to this comfort food experience.
What to Serve with Chili Cheese Fries?
As you prepare to serve this scrumptious dish, let's elevate your meal experience with some delightful pairings.
-
Crispy Onion Rings: These golden-brown rings add a satisfying crunch that contrasts beautifully with the soft, cheesy fries.
-
Classic Coleslaw: A refreshing, tangy slaw provides a vibrant balance to the richness of the chili and cheese, brightening each bite.
-
Guacamole and Chips: The creamy avocado dip brings a fresh element that cuts through the heaviness, making it a perfect sidekick to your fries.
-
Spicy Buffalo Chicken Wings: If you're in the mood for something bold, these wings enhance the heat while offering a texture contrast that is incredibly enjoyable.
-
Homemade Salsa: Fresh tomato salsa adds a zesty touch that's both colorful and refreshing, perfect for dipping your fries or topping them!
-
Dessert Suggestion - Chocolate Lava Cake: Follow the savory with a rich, molten chocolate cake that offers a luxurious and sweet finish after the hearty main dish.
Enjoy mixing and matching these flavorful sides to create a memorable meal that satisfies every craving!
Chili Cheese Fries Variations
Feel free to explore these delightful twists and tweaks to make the Chili Cheese Fries your very own!
-
Vegetarian Chili: Swap the meat chili for a hearty vegetarian version, packed with beans and vegetables for a fresh take. It’s loaded with flavor and offers a great alternative without sacrificing comfort!
-
Extra Cheesy: Add a blend of cheeses such as Monterey Jack or Pepper Jack along with the cheddar for a melty masterpiece. This flavor combination provides a decadent and rich cheesy experience that will leave you craving more.
-
Sweet Potato Fries: Use sweet potato fries instead of regular ones to introduce a delightful sweetness. The contrast of flavors between the sweet fries and savory chili creates a beautiful balance and an exciting twist on this classic dish!
-
Spicy Kick: Mix in diced chipotle peppers or a splash of hot sauce into the chili for an exciting heat boost. It adds depth and a smoky flavor that enhances the overall dish, perfect for spice lovers!
-
Loaded Toppings: Pile on extras like crispy bacon bits and avocado slices for a loaded version. The bacon adds a satisfying crunch, while the creamy avocado creates a delightful contrast with all the bold flavors!
-
Creamy Ranch Sauce: Drizzle a ranch dressing over the assembled fries instead of sour cream for a zesty twist. This creamy addition complements the dish while adding an herby touch that truly makes each bite unforgettable.
-
BBQ Sauce Drizzle: Add a light drizzle of barbecue sauce over the finished Chili Cheese Fries for a tangy twist. The sweetness and smokiness of BBQ perfectly blend with the chili, giving you an enticing fusion of flavors.
-
Caprese Style: Top with diced fresh mozzarella and basil instead of cheddar for a refreshing Caprese-style finish. It's a unique transformation that elevates the dish into a light, summer-inspired treat!
Make Ahead Options
These Chili Cheese Fries are perfect for meal prep and busy weeknights! You can prepare the chili topping up to 3 days in advance. Simply heat the chili, stir in the cheese, and allow it to cool before transferring to an airtight container to refrigerate. The frozen fries can be pre-baked ahead of time; just bake them until golden and let them cool completely before storing in an airtight container in the fridge for up to 24 hours. When you’re ready to serve, reheat the fries in the oven for crisper results, warm the chili mixture on the stove, and assemble your delightful dish. You’ll have a comforting meal ready in no time, just as delicious as if you made it fresh!
Storage Tips for Chili Cheese Fries
-
Fridge: Store any leftovers in an airtight container in the fridge for up to 3 days to maintain freshness and flavor.
-
Freezer: If you can't finish them quickly, freeze the chili and fries separately in airtight containers. They can last up to 2 months in the freezer.
-
Reheating: For best results, reheat the fries in the oven at 350°F until crispy again, about 10-15 minutes. Warm the chili on the stovetop until heated through, about 5-7 minutes.
-
Flavor Tip: When reheating, consider adding a bit more cheese on top for an indulgent touch to your leftover Chili Cheese Fries!

Chili Cheese Fries Recipe FAQs
What type of fries should I use for Chili Cheese Fries?
I recommend using frozen French fries for convenience and consistency. Look for ones that are labeled "crinkle-cut" or "steak fries" for a satisfying crunch that holds up well under the chili and cheese toppings.
How long can I store leftover Chili Cheese Fries?
Leftovers can be stored in an airtight container in the fridge for up to 3 days. To enjoy them again, simply reheat in the oven at 350°F for best results, which should take about 10-15 minutes to restore that crispy texture.
Can I freeze Chili Cheese Fries?
Absolutely! To freeze, I recommend separating the chili and fries into two airtight containers. They can be stored in the freezer for up to 2 months. When you're ready to enjoy, thaw in the fridge overnight. Reheat the fries in the oven at 350°F for about 15 minutes until crispy, and warm the chili on the stovetop over medium heat for about 5-7 minutes until heated through.
What if my fries are soggy after baking?
If your fries turn out soggy, they might not have been baked at a high enough temperature, or they were overcrowded on the baking sheet. Ensure they’re spread out evenly in a single layer to crisp up nicely. Next time, consider increasing the oven temperature slightly or baking them a few extra minutes for that perfect crunch!
Can I make this recipe gluten-free?
Yes, you can definitely make this Chili Cheese Fries recipe gluten-free! Just be sure to choose gluten-free frozen fries and check the chili's label to ensure it doesn’t contain any gluten ingredients. With these small tweaks, you'll have a delicious meal that everyone can enjoy!
Are Chili Cheese Fries safe for pets?
While it’s tempting to share, Chili Cheese Fries are not suitable for pets. The combination of spices and toppings, particularly the chili and cheese, may upset their stomachs or cause other health issues. It’s best to keep these indulgent treats just for you!
Chili Cheese Fries Recipe FAQs

Indulgent Chili Cheese Fries: A Comfort Food Dream!
Ingredients
Equipment
Method
- Preheat your oven to 425°F and bake the fries for 20-25 minutes, stirring halfway through.
- While fries are baking, heat chili in a medium saucepan over medium heat for 5-7 minutes.
- Mix in cheddar cheese to the heated chili, stirring until melted and creamy.
- Once fries are crispy, layer them on a serving platter and pour the cheesy chili over them.
- Top with sour cream, chopped green onions, and optional jalapeños.
- Serve immediately while hot and cheese is bubbly.


Leave a Reply