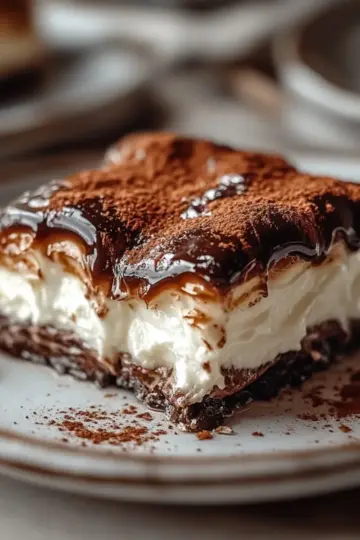
As I rummaged through my pantry on a quiet afternoon, I stumbled upon a forgotten bag of dark chocolate and a half-empty jar of espresso. Suddenly, a sweet idea sparked: why not whip up a Chocolate Espresso Cheesecake that brings a little coffee magic to dessert? This delightful recipe is not only a show-stopping indulgence but also surprisingly easy to create. With just 25 minutes of prep time, you’ll have a rich, velvety cheesecake that’s perfect for special occasions—or simply to enjoy at home. The combination of dark chocolate and espresso is a gourmet twist that elevates classic cheesecake into a sophisticated treat. Intrigued by how quickly you can impress your friends and family? Let’s dive into this delectable journey!
Why is this cheesecake a must-try?
Irresistible Combination: This Chocolate Espresso Cheesecake blends rich dark chocolate with the depth of espresso, creating an incredible flavor sensation.
Effortless Elegance: With just 25 minutes of prep, you can craft a dessert that looks and tastes gourmet, making you the star of any gathering.
Versatile Delight: Whether for a birthday, dinner party, or simply to treat yourself, this cheesecake suits every occasion and satisfies sweet cravings.
Texture Bliss: The creamy filling paired with a crunchy biscuit base offers a perfect marriage of textures that keeps everyone coming back for more.
Chill & Serve: Most of the time is hands-off, allowing you to relax while your cheesecake sets in the fridge—making it as time-saving as it is delicious!
Chocolate Espresso Cheesecake Ingredients
For the Base
• 200 grams digestive biscuits or Graham crackers – these add a delightful crunch, enhancing the overall texture.
• 100 grams unsalted butter – helps bind the crumbs and adds richness to the crust.
For the Filling
• 200 grams dark chocolate – the star of the show, providing deep flavors in your Chocolate Espresso Cheesecake.
• 250 grams cream cheese – delivers that luxurious creaminess and stability to the cheesecake.
• 200 grams castor sugar – sweetens the filling while keeping it smooth.
• 60 grams heavy cream – adds velvety richness and lightness to the mixture.
• 1 shot espresso (cooled) – infuses the cheesecake with a robust coffee flavor that pairs beautifully with chocolate.
Feel free to dive into this indulgent recipe, where each ingredient plays a crucial role in crafting the perfect dessert to impress your loved ones!
Step‑by‑Step Instructions for Chocolate Espresso Cheesecake
Step 1: Melt the Chocolate
Begin by gently melting 200 grams of dark chocolate using a double boiler or microwave. If using the microwave, heat in short bursts of 20 seconds, stirring in between until smooth. Once melted, set the chocolate aside to cool slightly, allowing it to reach a comfortable temperature without solidifying.
Step 2: Brew the Espresso
Brew a strong espresso shot and allow it to cool completely. This step enhances the coffee flavor in your Chocolate Espresso Cheesecake. Make sure the espresso is at room temperature before adding it to the mixture, as hot liquid could affect the consistency of your filling.
Step 3: Prepare the Cake Tin
Take a 22 to 23-centimeter springform cake tin and line the base with baking paper. This ensures easy removal after chilling. Grease the sides lightly if desired. Set the prepared tin aside, ready for the delicious biscuit base we'll create.
Step 4: Make the Biscuit Base
Pulse 200 grams of digestive biscuits or Graham crackers in a food processor until they turn into fine crumbs. Melt 100 grams of unsalted butter and combine it with the crumbs until the mixture resembles wet sand. Press this mixture firmly into the bottom of your lined cake tin to form a solid base.
Step 5: Whip the Cream
Using a stand mixer, whip 60 grams of heavy cream on medium speed until soft peaks form. This will add a delightful lightness to your cheesecake filling. Once whipped, set the cream aside in a separate bowl, ensuring it remains fluffy as you move on to the next steps.
Step 6: Beat Cream Cheese and Sugar
In a large bowl, beat together 250 grams of cream cheese and 200 grams of castor sugar using an electric mixer. Mix on medium speed until the mixture turns smooth and creamy, which should take about 2–3 minutes. This step creates a rich and luscious texture for your Chocolate Espresso Cheesecake.
Step 7: Combine Ingredients
Pour the cooled melted chocolate and the cooled espresso into the cream cheese mixture. Mix on low speed until everything is well combined and glossy, ensuring no chocolate lumps remain. The mixture should have a uniform color and a luxurious texture, perfect for your cheesecake filling.
Step 8: Fold in Whipped Cream
Gently fold the whipped cream into the chocolate and cream cheese mixture using a spatula. Be careful not to deflate the whipped cream; you want to maintain that airy consistency. Continue folding until fully incorporated, creating a light and airy filling for your Chocolate Espresso Cheesecake.
Step 9: Assemble and Chill
Pour the rich filling over the biscuit base in your prepared cake tin, smoothing the top with a spatula. Cover the cheesecake with plastic wrap and place it in the fridge. Chill for several hours or overnight until it sets completely, allowing the flavors to meld beautifully.
Step 10: Garnish and Serve
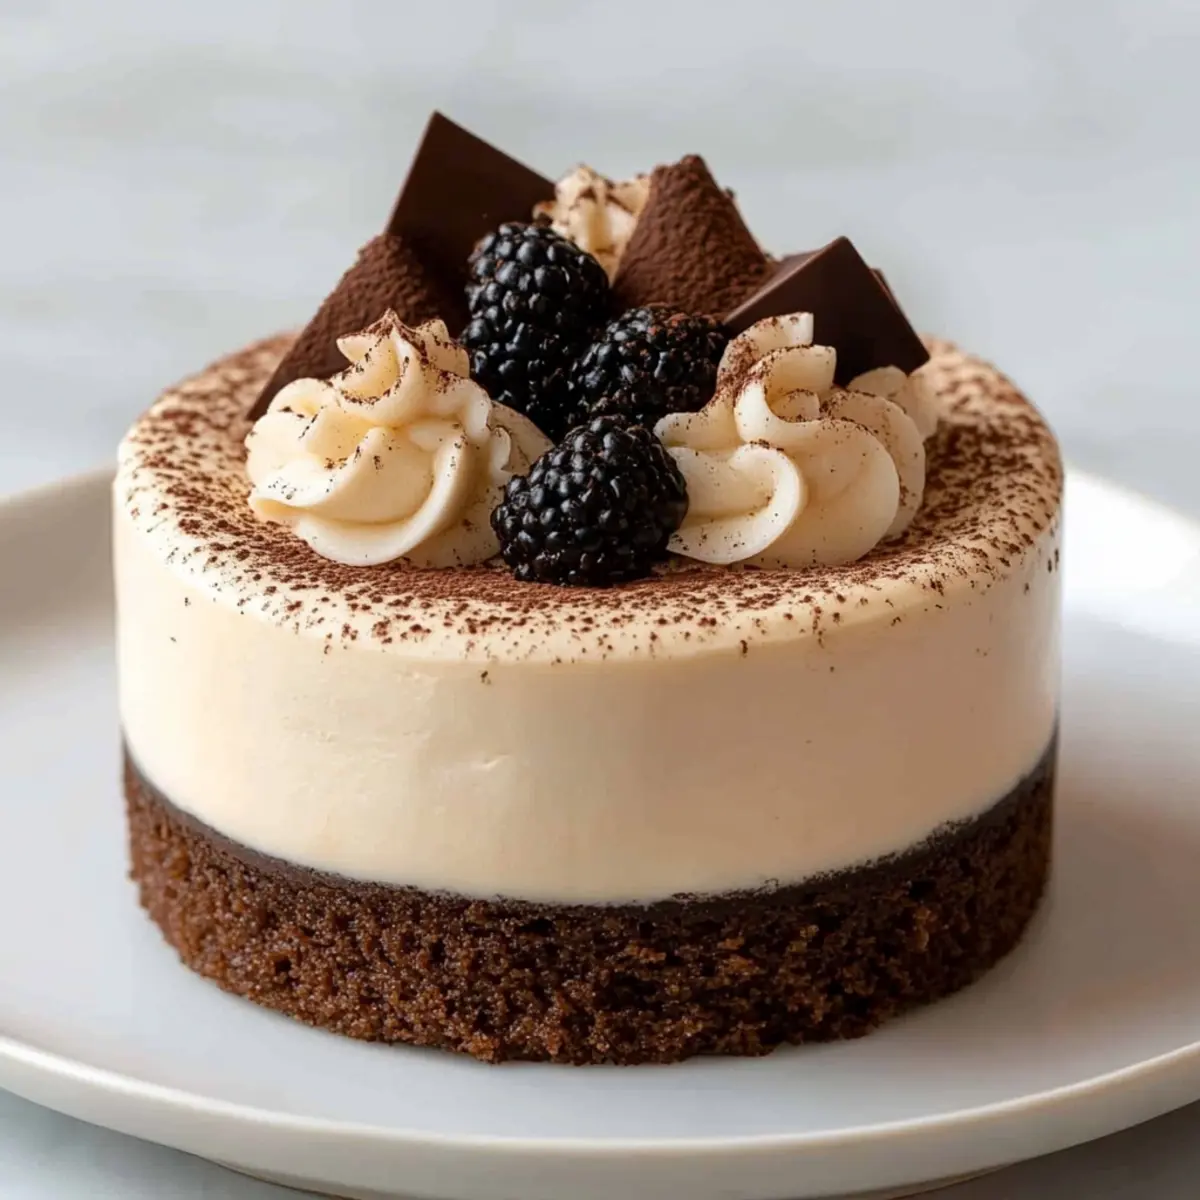
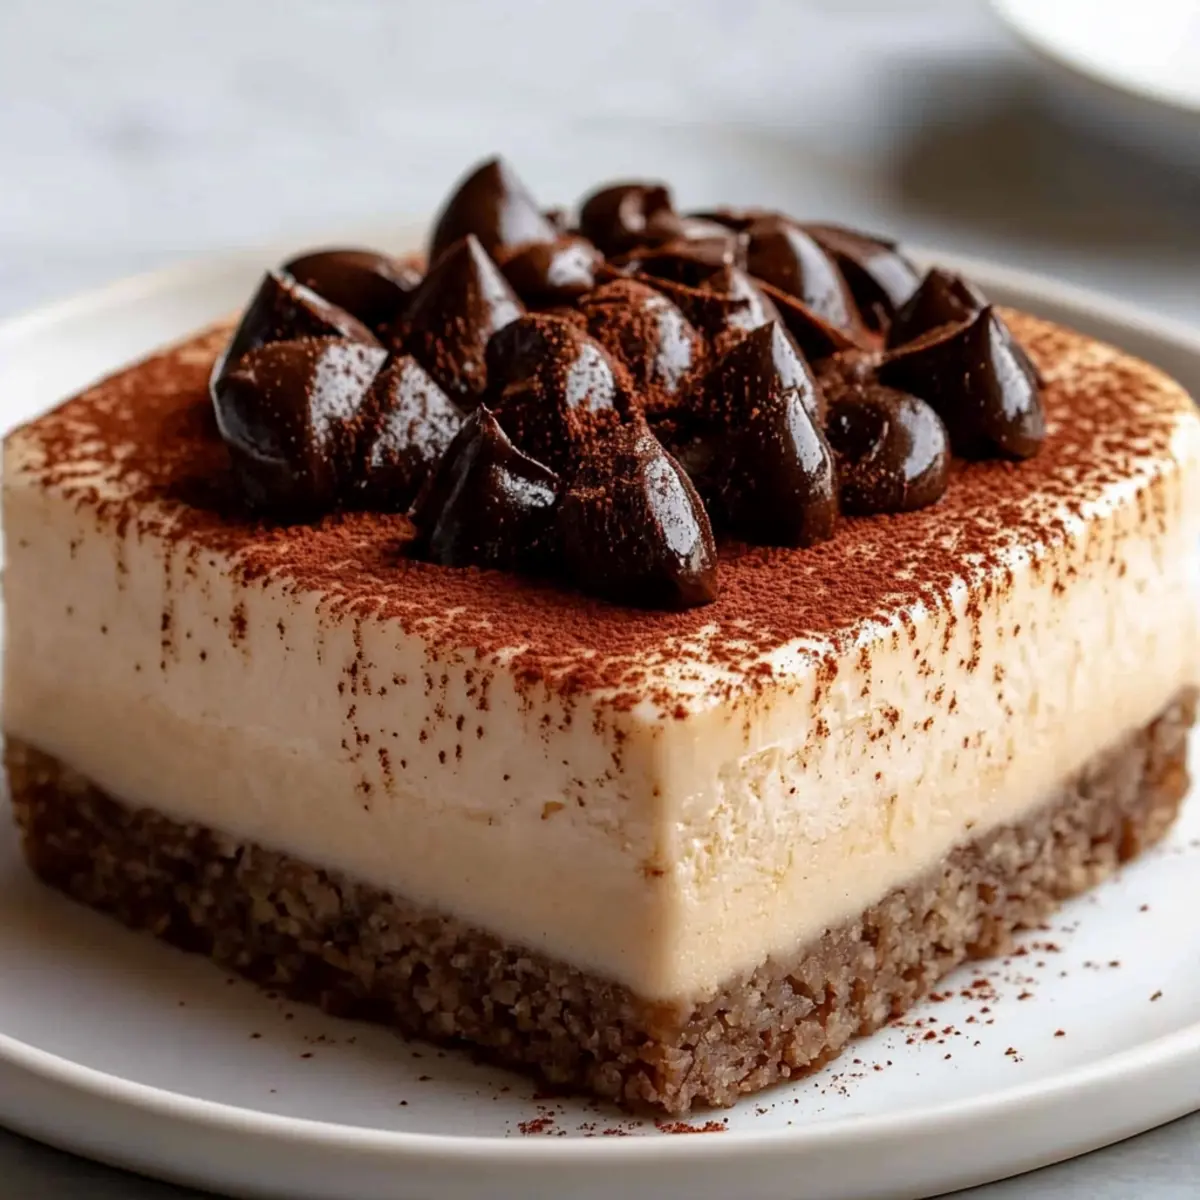
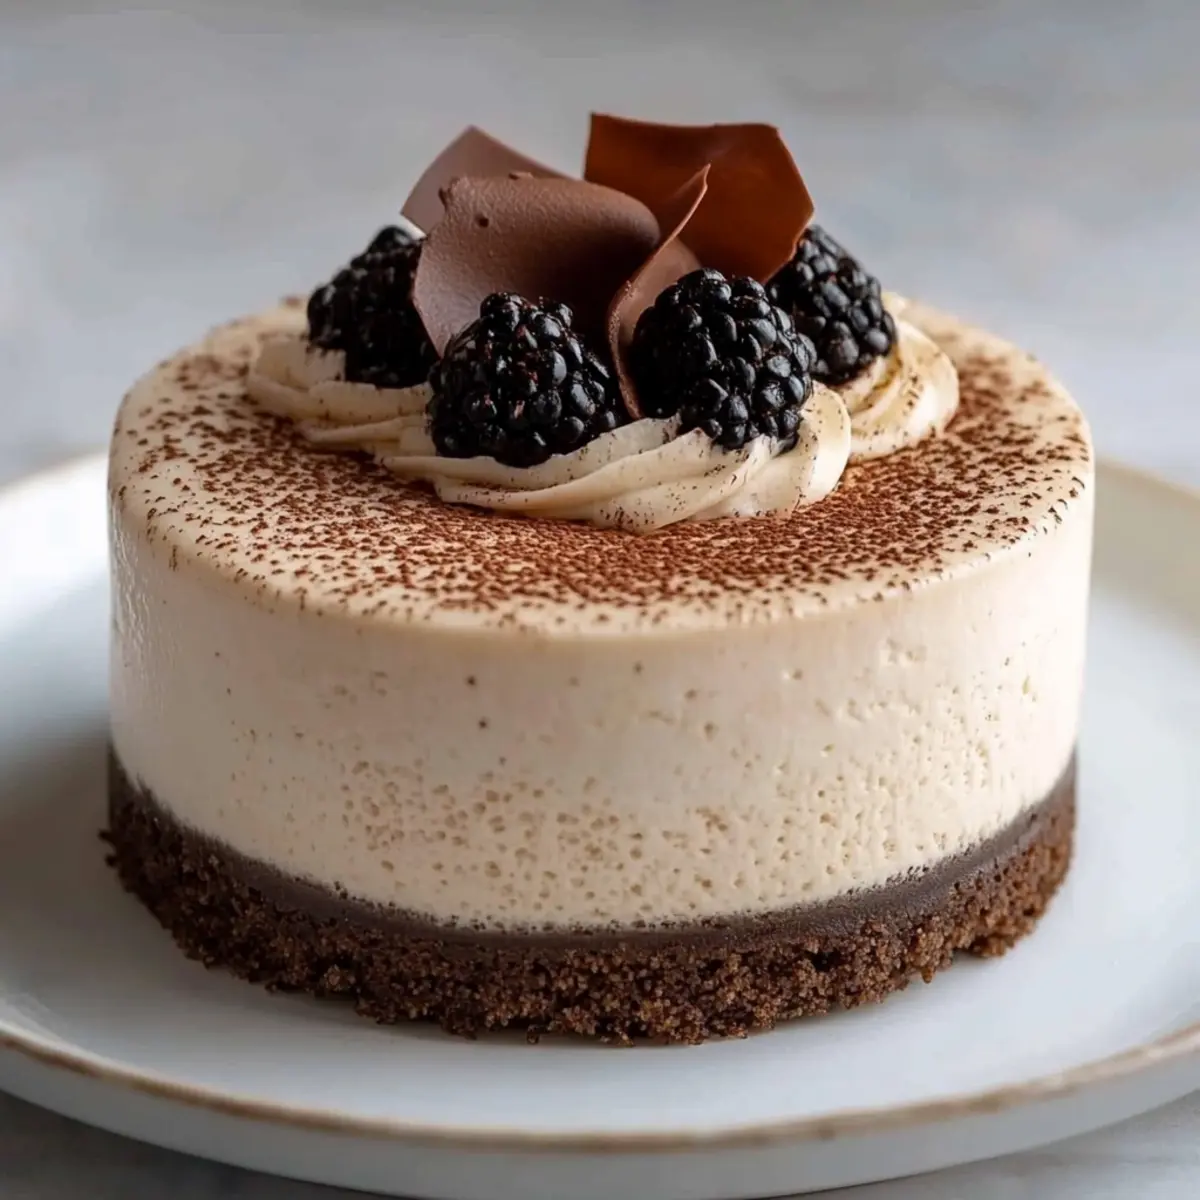
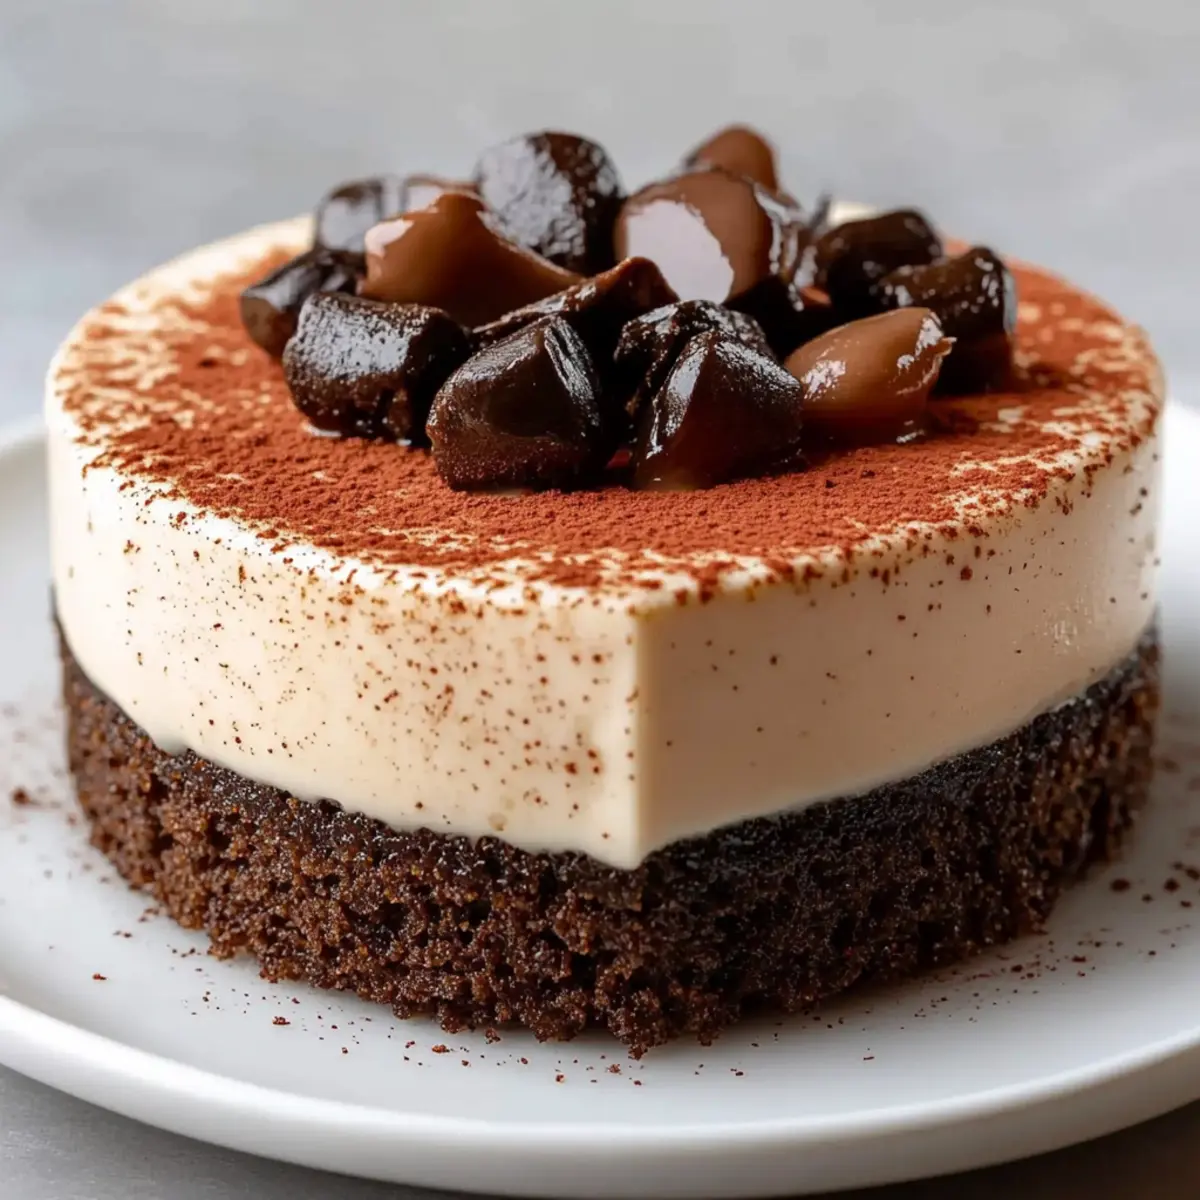
Before serving your Chocolate Espresso Cheesecake, remove it from the fridge. Garnish with grated dark chocolate and a generous dollop of whipped cream on top for an elegant finish. Slice and enjoy the rich, creamy delight enriched with coffee flavors, perfect for impressing your loved ones!
Chocolate Espresso Cheesecake Variations
Feel free to get creative with this delightful recipe and make it your own—who doesn’t love a little customized twist?
-
Gluten-Free: Substitute digestive biscuits with gluten-free cookies or almond flour for the crust, maintaining texture and flavor.
-
Vegan: Replace cream cheese with vegan cream cheese and use coconut cream instead of heavy cream for a rich, dairy-free option.
-
Nutty Flavor: Add 50 grams of ground hazelnuts to the biscuit base. This adds a delicious nutty crunch that complements the chocolate and coffee beautifully.
-
Flavor Infusions: Include a teaspoon of vanilla extract or a splash of orange liqueur in the cream cheese mixture to elevate the cheesecake's flavor profile.
-
Matcha Twist: For a unique green tea variation, replace half the chocolate with matcha powder. The vibrant color and flavor will wow your guests!
-
Extra Layers: Create a layered cheesecake by adding a thin layer of coffee-flavored mousse on top before chilling—it adds an impressive visual and taste contrast.
-
Heat It Up: For a spicy kick, sprinkle a pinch of cayenne pepper or add a dash of chili powder to the filling. It adds an unexpected warmth that pairs surprisingly well with chocolate.
-
Caramel Indulgence: Drizzle some caramel sauce over the cheesecake before serving to add extra sweetness and a beautiful presentation.
What to Serve with Chocolate Espresso Cheesecake
As you prepare to indulge in this creamy delight, let’s elevate your dessert experience with some beautiful pairings that tantalize the taste buds.
-
Fresh Berries: The tartness of raspberries or strawberries complements the richness of the cheesecake, adding a pop of color and flavor.
-
Espresso Martini: Kick up the coffee flavor with a delightful espresso martini, perfect for those who adore a warm caffeine boost alongside dessert.
-
Light Whipped Cream: A simple dollop of lightly sweetened whipped cream enhances the creamy texture and balances the intense chocolate notes beautifully.
-
Mint Leaves: Fresh mint leaves bring a refreshing contrast to the richness while adding a lovely touch of green to your dessert presentation.
-
Dark Chocolate Shavings: Sprinkle some grated dark chocolate on top for an extra layer of sophistication, accentuating the beautiful flavor of your cheesecake.
-
Chocolate Sauce: Drizzling rich chocolate sauce offers a decadent finishing touch, enhancing the dessert's elegance and adding indulgent sweetness.
Let these pairings inspire your next gathering, creating an unforgettable experience for your family and friends as they enjoy your remarkable Chocolate Espresso Cheesecake!
Make Ahead Options
These Chocolate Espresso Cheesecakes are fantastic for busy home cooks looking to save time! You can prepare the biscuit base and filling up to 24 hours in advance. To do this, simply follow Steps 1 through 8, then pour the chocolate and cream cheese mixture over the base and cover it tightly with plastic wrap. Refrigerate until you're ready to serve. This not only enhances the flavors but also keeps the cheesecake just as delicious! When ready to enjoy, take it out, garnish with grated dark chocolate and whipped cream, and slice into rich, creamy pieces that are sure to impress your guests!
How to Store and Freeze Chocolate Espresso Cheesecake
Fridge: Keep leftover Chocolate Espresso Cheesecake covered in an airtight container in the fridge for up to 3 days. This will help retain its creamy texture and rich flavor.
Freezer: You can freeze the cheesecake for up to 2 months. Slice it into portions, wrap each slice tightly in plastic wrap, and then place them in an airtight container before freezing.
Thawing: When ready to enjoy, transfer the cheesecake to the fridge to thaw overnight. This method preserves its delicious taste and texture.
Reheating: There’s no need to reheat this dessert, as serving it chilled brings out the best of its flavors. Simply garnish and enjoy!
Expert Tips for the Best Chocolate Espresso Cheesecake
-
Chocolate Quality: Use high-quality dark chocolate for a rich, deep flavor in your Chocolate Espresso Cheesecake. Avoid cheap chocolate, as it can affect taste and texture.
-
Whip Gently: When folding in the whipped cream, do it gently to maintain the airy texture. Over-mixing can lead to a dense filling instead of a light one.
-
Chill Properly: Allow your cheesecake to chill for at least 4 hours, or overnight if possible. This ensures the filling sets perfectly, enhancing the flavors.
-
Room Temperature Ingredients: Make sure your cream cheese and heavy cream are at room temperature before mixing. This helps achieve a smoother filling and prevents lumps.
-
Creative Garnishes: Try topping the cheesecake with chocolate shavings, coffee beans, or even a dusting of cocoa powder for added visual appeal and a gourmet touch.
Chocolate Espresso Cheesecake Recipe FAQs
What type of chocolate should I use for the cheesecake?
Absolutely! For the best flavor and texture, I recommend using high-quality dark chocolate with at least 70% cocoa content. This richness is what makes the Chocolate Espresso Cheesecake truly indulgent. Avoid lower-quality chocolates as they can affect both taste and consistency.
How long can I store leftover cheesecake in the fridge?
You can keep your Chocolate Espresso Cheesecake covered in an airtight container in the fridge for up to 3 days. This helps to maintain its luscious texture and complex flavors. Just remember to slice it as you go to avoid excess exposure to air.
Can I freeze this cheesecake? If so, what's the best method?
Absolutely! You can freeze Chocolate Espresso Cheesecake for up to 2 months. Slice it into portions, wrap each slice tightly in plastic wrap, and then place them in an airtight container or freezer bag. This way, you can enjoy a piece whenever the craving strikes!
How do I properly thaw the frozen cheesecake?
When you’re ready to enjoy your frozen slices, grab them from the freezer and transfer them to the fridge to thaw overnight. This method ensures that the cheesecake maintains its wonderful texture and flavor. Avoid thawing at room temperature to prevent any unwanted texture changes.
Is this cheesecake suitable for people with dietary restrictions?
Very! This Chocolate Espresso Cheesecake contains gluten from digestive biscuits or Graham crackers, so those avoiding gluten should opt for gluten-free alternatives. Additionally, if anyone has a dairy allergy, consider using a plant-based cream cheese and dairy-free whipped cream options to make this dessert more accessible without compromising on flavor!
What should I do if my cheesecake doesn't set properly?
If your Chocolate Espresso Cheesecake hasn't set after chilling, it may need more time in the fridge. I recommend giving it an additional couple of hours or even overnight. If it remains too soft, try refrigerating it again for a longer period. Avoid rushing the chilling process, as patience is key to achieving that perfect creamy texture!
Indulgent Chocolate Espresso Cheesecake for the Perfect Treat
Ingredients
Equipment
Method
- Melt the chocolate by gently melting 200 grams of dark chocolate using a double boiler or microwave.
- Brew a strong espresso shot and allow it to cool completely.
- Prepare the cake tin by taking a 22 to 23-centimeter springform cake tin and lining the base with baking paper.
- Make the biscuit base by pulsing 200 grams of digestive biscuits or Graham crackers in a food processor until fine crumbs.
- Whip the cream by using a stand mixer to whip 60 grams of heavy cream until soft peaks form.
- Beat cream cheese and sugar by mixing 250 grams of cream cheese and 200 grams of castor sugar in a large bowl.
- Combine ingredients by pouring cooled melted chocolate and cooled espresso into the cream cheese mixture and mix well.
- Fold in whipped cream gently into the chocolate and cream cheese mixture using a spatula.
- Assemble and chill by pouring the rich filling over the biscuit base and refrigerate until set, ideally overnight.
- Garnish and serve by removing the cheesecake from the fridge and garnishing with grated dark chocolate and whipped cream.

Leave a Reply