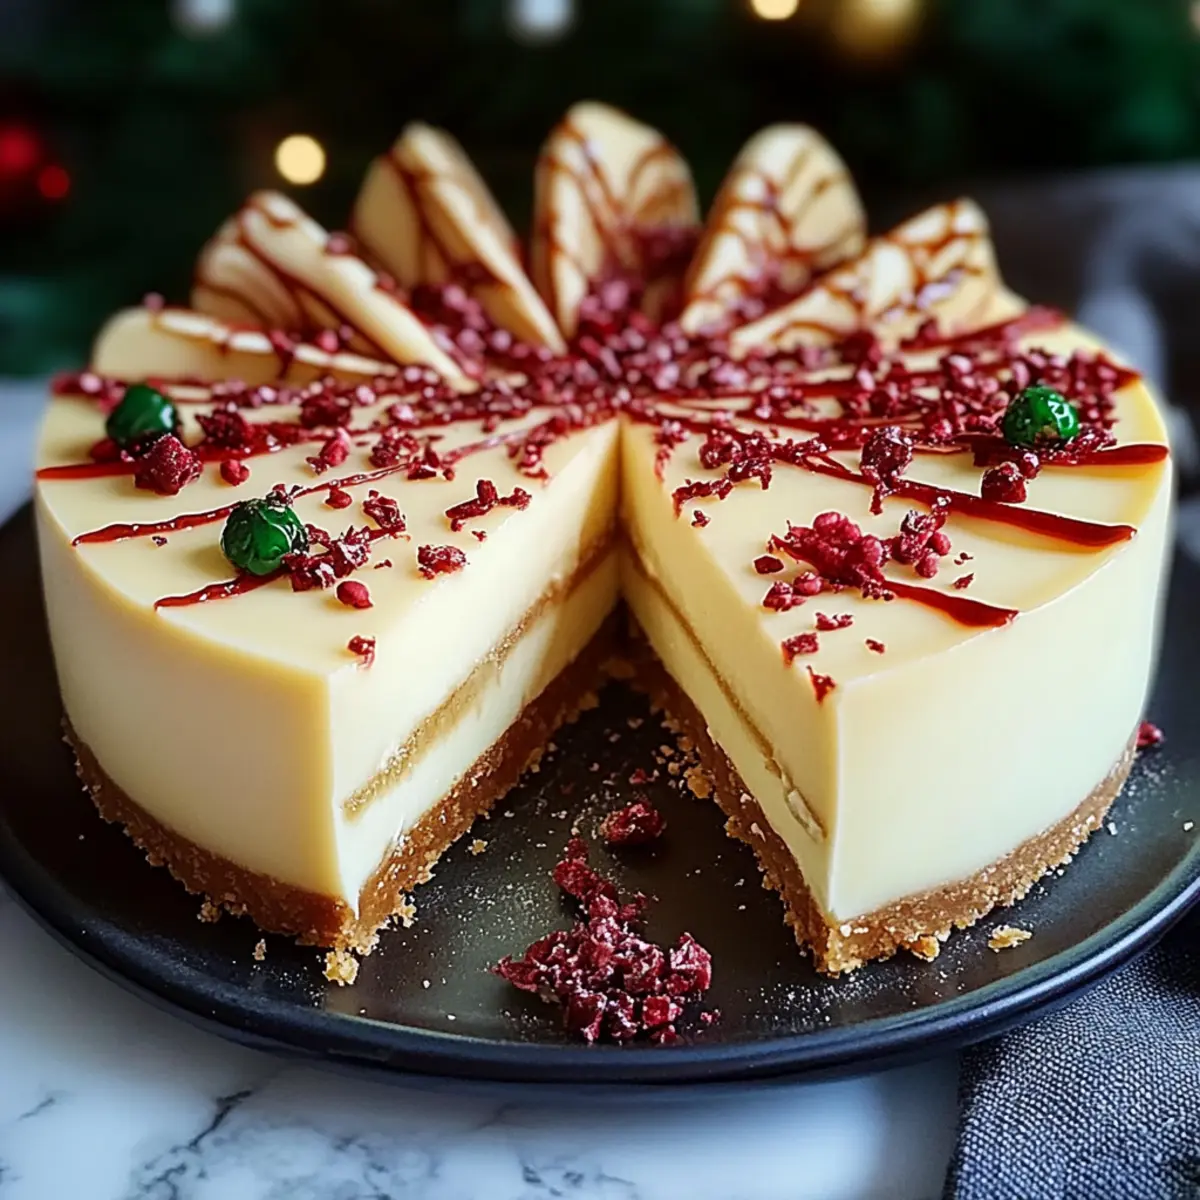
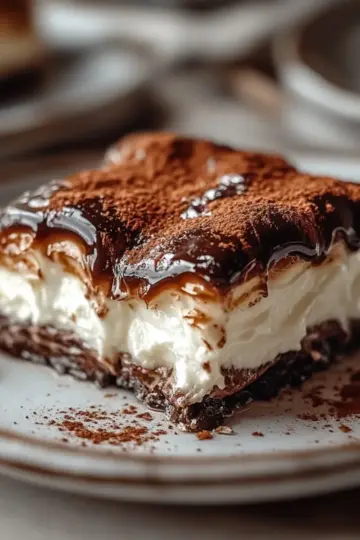
As I sift through boxes of holiday decorations, a small stack of treasured recipes always catches my eye, especially the one for Christmas Cookie Cheesecake. This decadent dessert wraps the warmth of festive spices and creamy goodness into each heavenly bite. Perfect for holiday gatherings, this cheesecake is not just an eye-catching centerpiece; it's a crowd-pleaser that embodies the spirit of homemade joy. Not only is it quick to whip up, but you can prepare it ahead of time, leaving you free to enjoy cherished moments with family and friends. Trust me, when you take that first bite, it will transport you to your favorite holiday memories. Curious how to create this festive delight? Let’s dive into the recipe!
Why Is This Cheesecake So Special?
Indulgent, creamy goodness: The Christmas Cookie Cheesecake combines rich cream cheese and festive spices, creating a dessert that's both comforting and celebratory.
Effortless preparation: With only 30 minutes of prep, this recipe is perfect for busy holiday schedules.
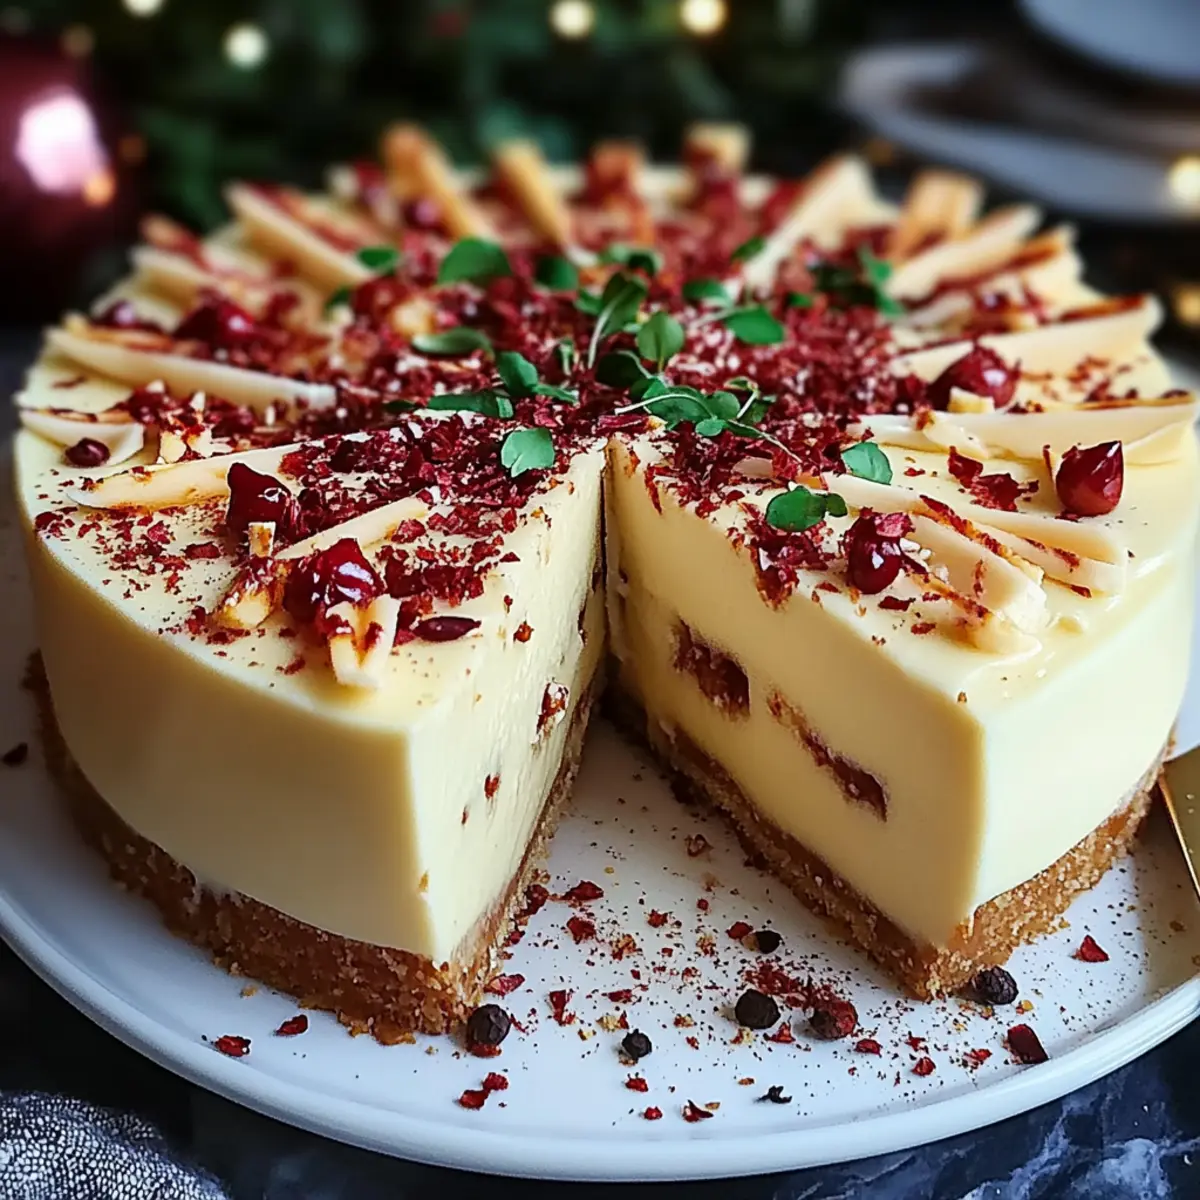
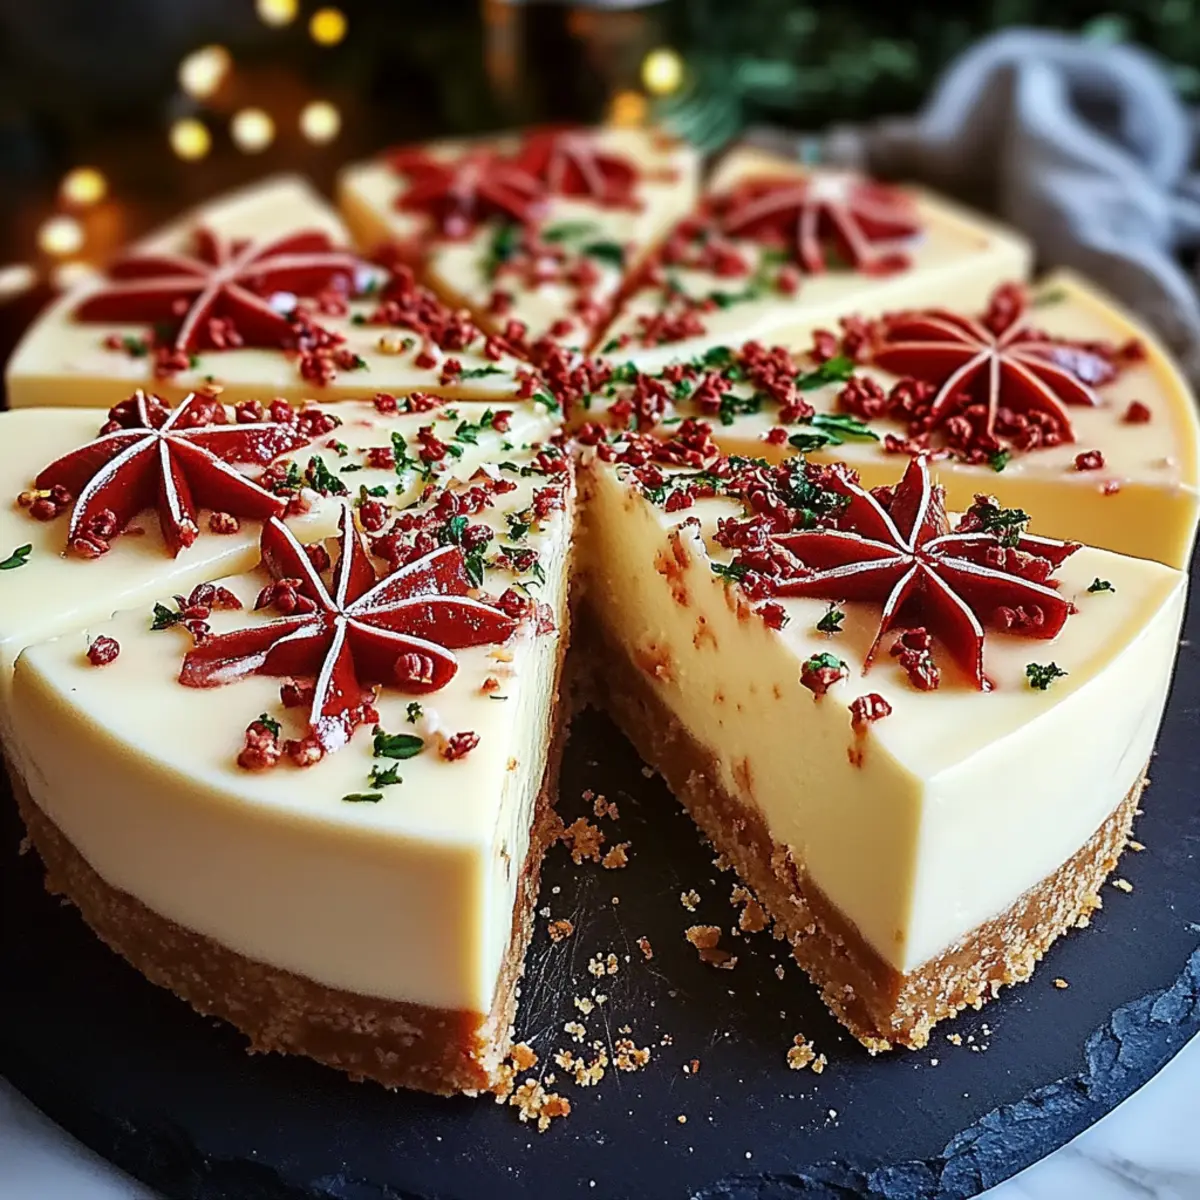
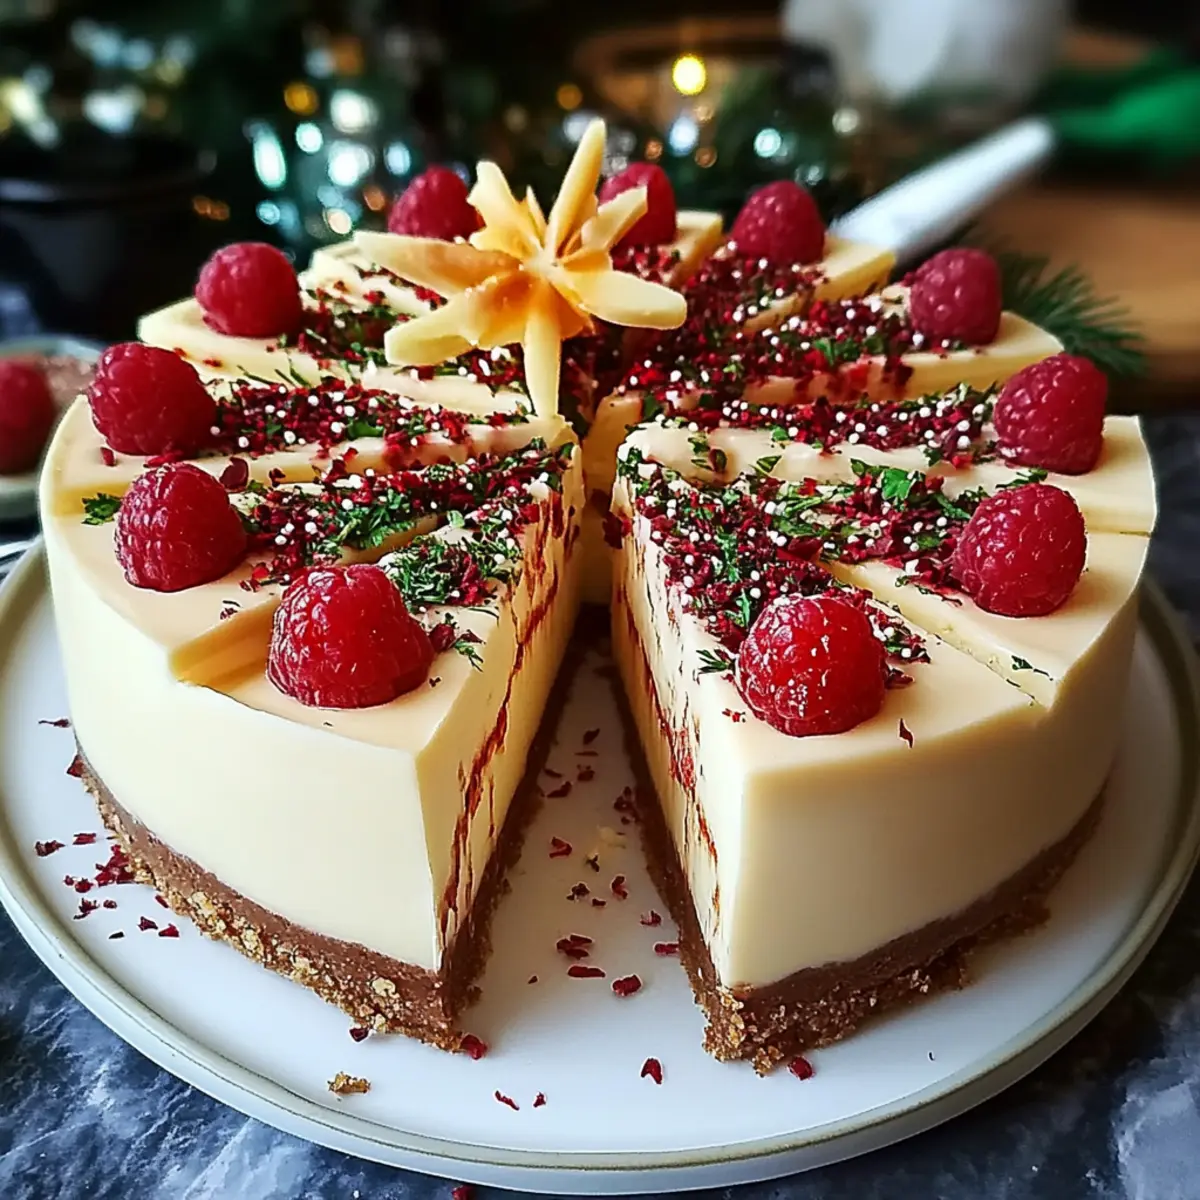
Versatile toppings: Adorn it with whipped cream, chocolate drizzle, or crushed candy canes for that personal touch!
Make ahead option: Prep it the night before, allowing the flavors to deepen while you relax and enjoy the festivities.
Crowd-pleaser: Everyone loves the fusion of cheesecake and beloved cookie flavors, making it an instant hit at any gathering!
Christmas Cookie Cheesecake Ingredients
For the Crust
• Cookie crumbs – Use your favorite cookies to create a delightful base that enhances the flavor of your cheesecake.
• Butter – Melted butter helps bind the cookie crumbs together for a sturdy crust.
For the Filling
• Cream cheese – Soften it to room temperature for easy mixing and a smooth texture.
• Sugar – Balances the cream cheese's tanginess for a sweet, harmonious flavor.
• Vanilla extract – Adds a lovely warmth and depth to the cheesecake.
• Large eggs – Helps achieve a light and airy filling; room temperature eggs are best for even mixing.
• Ground cinnamon – Infuses that cozy holiday spice into every bite of your Christmas Cookie Cheesecake.
• Ground nutmeg – Complements the cinnamon with its aromatic zest, enhancing the festive flavor.
For the Topping
• Whipped topping – Adds a light, fluffy finish that balances the dense cheesecake.
• Optional toppings – Use whipped cream, chocolate drizzle, or crushed candy canes for a fun, festive flair!
Step‑by‑Step Instructions for Christmas Cookie Cheesecake
Step 1: Preheat the Oven
Begin your delicious journey by preheating your oven to 350°F (175°C). This is the ideal temperature for your Christmas Cookie Cheesecake to bake perfectly. Set the oven rack to the middle position so that the cheesecake cooks evenly, and gather your ingredients to streamline your preparation process.
Step 2: Prepare the Crust
In a mixing bowl, combine the cookie crumbs and melted butter, mixing thoroughly until fully integrated. This creates a rich, buttery crust that complements the cheesecake. Press the crumb mixture firmly and evenly into the bottom of a 9-inch cheesecake pan to form a solid base, ensuring it holds together as it bakes.
Step 3: Mix the Filling
In another bowl, beat the softened cream cheese and sugar together with an electric mixer until smooth and creamy, about 2-3 minutes. Ensure there are no lumps present. Add in the vanilla extract, eggs, ground cinnamon, and ground nutmeg, continuing to mix until all ingredients are harmoniously combined and the mixture is light and fluffy.
Step 4: Pour the Filling
Carefully pour the creamy filling over the prepared crust in the cheesecake pan, smoothing it out with a spatula for an even surface. The cheesecake mixture should fill the pan almost to the top, creating a lovely, creamy layer that will become the centerpiece of your Christmas Cookie Cheesecake.
Step 5: Bake the Cheesecake
Place your cheesecake in the preheated oven and bake for approximately 1 hour. Look for the edges to be set while the center still has a slight jiggle. This slight movement indicates a perfectly creamy texture. Keep a close eye to ensure it doesn't overbake, as this can affect the final texture.
Step 6: Cool and Chill
Once baked, remove your cheesecake from the oven and let it cool on a wire rack until it reaches room temperature. After cooling, cover it with plastic wrap and refrigerate for a minimum of 4 hours, or overnight for the best flavor. Chilling allows the cheesecake to set completely, enhancing the taste of your Christmas Cookie Cheesecake.
Step 7: Serve and Enjoy
When ready to serve, remove the cheesecake from the refrigerator and slice it with a sharp knife. For clean edges, dip the knife in warm water before each cut. This Christmas Cookie Cheesecake is delicious served plain or topped with whipped cream, a delightful chocolate drizzle, or festive crushed candy canes.
What to Serve with Christmas Cookie Cheesecake
Indulging in a slice of this Christmas Cookie Cheesecake is just the beginning; let's create a festive dining experience!
-
Classic Hot Cocoa: This warm drink, with its velvety chocolate flavor, beautifully complements the creamy cheesecake, enhancing the holiday spirit.
-
Ginger Snaps: The spiciness of each bite pairs delightfully with the cheesecake's sweetness, offering a crunchy contrast that pleases the palate.
-
Roasted Brussels Sprouts: Their earthy, nutty flavor adds a savory touch, balancing the creamy cheesecake with a healthier side for your holiday gathering.
-
Fruit Compote: A warm, spiced fruit topping brings a burst of color and freshness to your dessert table, complementing the rich flavors of cheesecake perfectly.
-
Spiced Apple Cider: This warm and comforting drink echoes the holiday spices in the cheesecake, creating an aromatic experience that feels like a hug in a cup.
-
Light Salad with Citrus Dressing: A refreshing green salad with a zesty dressing brightens the meal, contrasting the dense cheesecake and adding a touch of lightness.
-
Vanilla Ice Cream: A scoop of this creamy delight on the side enhances every slice of cheesecake, adding a cool, smooth texture that melts in your mouth.
-
Chocolate Drizzle: Add a visual element and extra sweetness by drizzling warm chocolate over the cheesecake, creating an enticing finish that no one can resist.
Make Ahead Options
These Christmas Cookie Cheesecake are perfect for busy cooks looking to save time! You can prepare the crust and cheesecake filling up to 24 hours in advance. Simply mix the cookie crumbs with melted butter and press them into the pan, then store them in the refrigerator. For the filling, combine the cream cheese, sugar, and spices, but hold off on adding the eggs until you're ready to bake, as this helps maintain freshness. When ready to bake, simply pour the filling over the prepped crust and follow the baking instructions. This way, your cheesecake will be just as delicious and flavorful when served at your holiday gathering!
How to Store and Freeze Christmas Cookie Cheesecake
Fridge: Cover your cheesecake tightly with plastic wrap or aluminum foil and refrigerate. It will stay fresh for up to 1 week.
Freezer: For longer storage, slice the cheesecake and place the pieces in an airtight container. Freeze for up to 3 months, allowing you to enjoy your Christmas Cookie Cheesecake anytime!
Thawing: When ready to serve, transfer the frozen slices to the fridge for a few hours or overnight to thaw gently.
Reheating: If you prefer it warm, heat gently in the microwave for about 10-15 seconds until slightly warmed through, but enjoy it chilled for the best taste!
Christmas Cookie Cheesecake Variations
Get ready to sprinkle your own flair onto this delightful dessert as you explore these fun twists!
-
Gluten-Free Crust: Substitute cookie crumbs with gluten-free options like almond flour or gluten-free cookies for a delicious alternative.
-
Chocolate Lovers: Add 1 cup of melted chocolate to the filling for an indulgent chocolate-infused cheesecake that will satisfy any sweet tooth.
-
Minty Fresh: Incorporate 1 teaspoon of peppermint extract into the filling, or crush candy canes to fold into the mixture for a refreshing holiday twist.
-
Nutty Addition: Fold in ½ cup of chopped nuts like walnuts or pecans into the filling for added crunch and rich flavor.
-
Reduced Sugar: Swap out regular sugar for stevia or a monk fruit sweetener to create a lower-calorie cheesecake without compromising flavor.
-
Fruit-Infused: Blend in a cup of pureed fruit such as cranberries or raspberries for a tart, vibrant taste that adds a pop of color and excitement.
-
Extra Creamy: Use mascarpone cheese instead of cream cheese for a silkier texture that'll leave everyone asking for seconds.
-
Heat it Up: Spice things up by adding a pinch of cayenne pepper or a dash of chili powder for a sweet and spicy flavor explosion that'll thrill adventurous palates!
Expert Tips for Christmas Cookie Cheesecake
• Crust Consistency: Ensure the cookie crumbs and melted butter are evenly mixed for a sturdy and delicious crust that won’t crumble when slicing.
• Cream Cheese Temperature: Always soften cream cheese to room temperature for a smoother batter; it blends better and avoids lumps in your Christmas Cookie Cheesecake.
• Bake Wisely: Keep an eye on the baking time. The edges should be set, but a slight jiggle in the center indicates it’s perfectly creamy.
• Chill for Flavor: Allow your cheesecake to refrigerate for at least 4 hours, or overnight if possible. This enhances flavor and texture, making each bite more delightful.
• Serving Style: For an elegant presentation, slice using a warm, wet knife. It creates cleaner edges that look stunning on your table!
Christmas Cookie Cheesecake Recipe FAQs
How do I choose the right cookies for the crust?
Absolutely! The best cookies for your Christmas Cookie Cheesecake crust should be sturdy enough to hold together but tasty too. I recommend classic options like ginger snaps, Oreos, or even Biscoff cookies. Look for cookies that are not too crumbly, as they will bind better with melted butter.
How should I store the cheesecake?
Very good question! To keep your cheesecake fresh, cover it tightly with plastic wrap or aluminum foil and refrigerate. It should stay delicious for up to one week. If you want to enjoy it longer, you can freeze it—just make sure it’s in an airtight container to prevent freezer burn.
Can I freeze Christmas Cookie Cheesecake?
Absolutely! For freezing, slice the cheesecake into individual pieces and place them in an airtight container or wrap each slice in plastic wrap followed by foil. This helps to maintain its flavors and textures. Your slices will be good for up to 3 months in the freezer. When you’re ready to enjoy, simply thaw in the fridge for several hours or overnight.
What if my cheesecake cracks while baking?
No worries, it happens! If you see cracks in your cheesecake, it might be due to overbaking or temperature fluctuations. To prevent this, make sure to bake at the recommended temperature and avoid opening the oven door too frequently. A water bath can also help provide moisture during baking, reducing the chances of cracks.
Are there any dietary considerations for this cheesecake?
Great question! If you or your guests have allergies, it's important to take note. This recipe contains dairy (cream cheese) and eggs, which can be problematic for some. For a gluten-free option, use gluten-free cookies for the crust. If dairy is an issue, consider trying dairy-free cream cheese alternatives. As always, check ingredient labels for any potential allergens!
Can I use flavored cream cheese for a twist?
Definitely! I often make this cheesecake with flavored cream cheese, like pumpkin spice or marshmallow, for a unique treat. Just remember to adjust the sugar, as flavored cream cheese can already contain sweeteners. It’s a delightful way to put a personal spin on your Christmas Cookie Cheesecake!
Indulgent Christmas Cookie Cheesecake That Wows Every Bite
Ingredients
Equipment
Method
- Preheat your oven to 350°F (175°C) and set the oven rack to the middle position.
- In a mixing bowl, combine cookie crumbs and melted butter until fully mixed, then press into the bottom of a 9-inch pan.
- Beat cream cheese and sugar until smooth, then add vanilla, eggs, cinnamon, and nutmeg and mix until fluffy.
- Pour the filling over the crust and smooth it out with a spatula.
- Bake for approximately 1 hour until edges set and center jiggles slightly.
- Let cool on a wire rack to room temperature, then cover and refrigerate for at least 4 hours.
- Slice with a warm, wet knife, serve with optional toppings.

Leave a Reply